
Can You Paint a Outdoor Lounge Chair?

Yes, you absolutely can paint an outdoor lounge chair to give it a fresh new look. We found that a good quality paint designed for outdoor use will protect your furniture and make it shine.
Giving your patio furniture a new coat of paint is a cost-effective way to revitalize your outdoor space. You can transform old, faded pieces into stylish additions, adding personality and extending their lifespan. Just make sure you choose the right paint for the material.
- Prep is key for a lasting finish.
- Choose outdoor-specific paint.
- Different materials need different paints.
- Proper drying time is important.
- Enjoy your refreshed furniture!
Ready to give your outdoor lounge chair a stunning makeover? Let’s walk through everything you need to know to get beautiful, long-lasting results.
Revitalizing Your Outdoor Lounge Chair: The How-To Guide
Giving your outdoor lounge chair a fresh coat of paint is a fantastic project. It’s a way to refresh your space without buying new furniture. We’ll walk you through the entire process, making it simple and straightforward.
You can transform a faded, tired piece into a bright, inviting part of your patio. It’s all about choosing the right materials and following a few key steps. Let’s get that chair looking amazing!
Gathering Your Painting Arsenal
Before you even think about brushes, you need the right tools. Having everything ready saves time and frustration. Think of it like a chef prepping ingredients before cooking.
What do you need for a successful painting project? We’ve compiled a list of essentials to ensure a smooth finish. You don’t want to start and realize you’re missing something important.
Essential Supplies for Your Project
- Drop cloths or old sheets (to protect your work area)
- Wire brush or sandpaper (medium-grit, 100-150 grit)
- Mild soap and water or an all-purpose cleaner
- Rags or sponges
- Painter’s tape (if you have areas you don’t want to paint)
- Primer (if recommended for your chair material and paint)
- Outdoor-specific paint (spray paint or brush-on)
- Paintbrushes or rollers (if using brush-on paint)
- Protective gloves and eye protection
- Dust mask
Having these items on hand makes a big difference. It helps you work efficiently and safely. A little preparation goes a long way here.
Prepping Your Chair for a Flawless Finish
Preparation is the most critical step in any painting project. We’ve found that cutting corners here leads to peeling and cracking paint down the line. You want your new paint job to last, right?
Think of it as creating a clean canvas for your paint. A properly prepped surface allows the paint to adhere much better. This means a more durable and beautiful result for your outdoor lounge chair.
Cleaning and Repairing Your Chair
Start by giving your chair a thorough cleaning. Dirt, grime, and mildew are paint’s worst enemies. We recommend using a mild detergent and water.
Scrub away any stubborn spots. A stiff brush can be very helpful here. Rinse the chair completely and let it dry thoroughly. This drying step is super important; moisture under new paint can cause issues.
Next, inspect for any damage. Are there loose screws? Minor cracks? Address these now. Tighten anything wobbly and use an appropriate filler for small holes or cracks. Sand any patched areas smooth once dry.
Sanding: The Key to Adhesion
Sanding might seem like extra work, but it’s essential. It creates a slightly rough surface that paint can grip onto. This is especially true for chairs with a glossy finish.
Use a medium-grit sandpaper (around 100-150 grit). Lightly sand all surfaces you plan to paint. You don’t need to remove all the old paint, just scuff up the surface. After sanding, wipe away all dust with a damp cloth and let it dry.
For metal chairs with rust, a wire brush is your best friend. Remove as much rust as possible. Then, use a rust-inhibiting primer before painting. This protects against future corrosion, a tip many experts suggest (Environmental Protection Agency).
Choosing the Right Paint for Your Outdoor Chair
The type of paint you choose is crucial. It needs to withstand the elements: sun, rain, and temperature changes. We can’t stress this enough – don’t use indoor paint!
Outdoor paints are formulated to be durable and resistant to fading, cracking, and mildew. Investing in good quality outdoor paint will pay off in the long run. It means less touch-up work for you later.
Matching Paint to Material
Different chair materials require different paint types. What works for metal might not be best for plastic or wood. Always read the label on the paint can.
Here’s a quick guide to help you decide:
| Chair Material | Recommended Paint Type | Key Considerations |
|---|---|---|
| Metal (Wrought Iron, Aluminum) | Rust-inhibiting enamel, outdoor spray paint for metal | Requires thorough rust removal; primer often beneficial. Look for “direct to metal” options. |
| Plastic (Resin, PVC) | Plastic-specific spray paint, outdoor acrylic latex paint with good adhesion | Surface must be super clean. Some plastics may need a special adhesion promoter primer. |
| Wood (Teak, Cedar, Pine) | Exterior latex or oil-based paint, exterior wood stain/sealant | Sand well, prime knots. Consider if you want to see the wood grain (stain) or cover it (paint). |
| Wicker/Rattan (Natural or Synthetic) | Outdoor spray paint, exterior latex paint (applied with brush/roller) | Spray paint is often easiest for intricate weaves. Ensure good coverage without drips. |
See? It’s not a one-size-fits-all situation. Always check what the manufacturer recommends for your specific chair material. This helps avoid peeling paint nightmares.
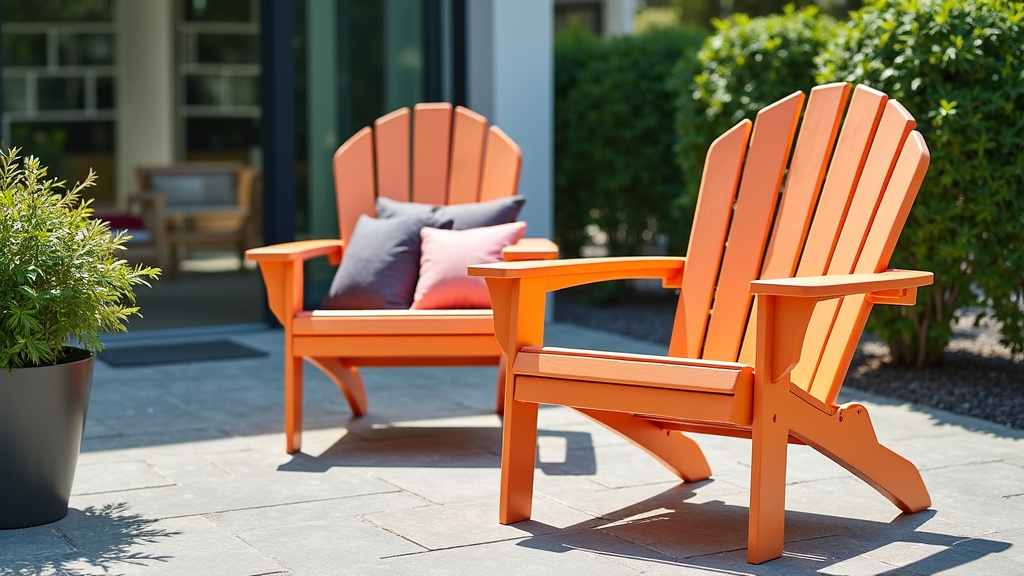
The Art of Painting Your Outdoor Chair
You’ve prepped, you’ve picked your paint – now for the fun part! Painting is where your chair truly transforms. Take your time, and remember: thin, even coats are always better than one thick one.
Patience during the painting process leads to professional-looking results. Rushing can create drips and uneven coverage. We want your chair to look factory-fresh, or even better!
Priming for Performance
Should you prime? For many outdoor projects, especially on bare wood, rusty metal, or some plastics, the answer is a resounding “yes.” Primer creates an ideal surface for the paint to stick to.
A good primer can also block stains, prevent rust, and ensure your topcoat colors appear vibrant. Apply a thin, even coat of the appropriate outdoor primer. Let it dry completely according to the product instructions. This drying time is crucial for proper adhesion.
Applying Your Chosen Paint
Whether you’re using spray paint or brush-on, the technique is similar: several thin coats are key. This builds durability and prevents drips.
For spray paint, hold the can about 8-12 inches from the surface. Use a steady, sweeping motion. Overlap each pass slightly. For brush-on, use smooth, even strokes. Don’t overload your brush or roller.
Allow each coat to dry completely before applying the next. This might mean waiting a few hours or even overnight. Always check the paint can for specific drying times. Rushing this step is a common mistake that leads to sticky or easily damaged finishes.
The Curing Process: Don’t Rush It!
Once you’ve applied the final coat, your chair looks amazing! But it’s not quite ready for lounging yet. Paint needs to cure, not just dry. What’s the difference?
Drying is when the paint feels dry to the touch. Curing is when the paint hardens completely and reaches its maximum durability. This can take much longer than just drying.
Giving Your Chair Time to Strengthen
Most outdoor paints need several days, sometimes even a week or more, to fully cure. During this time, the paint film hardens and becomes more resistant to scratches, chips, and weather damage.
Placing your newly painted chair in direct sunlight during the curing process can sometimes help, but always check your specific paint instructions. Avoid using or placing heavy items on the chair until it’s fully cured. Think of it as letting cement fully set before you walk on it.
We’ve often seen people get excited and use their chair too soon. This can leave imprints or damage the fresh paint. Be patient – it’s worth the wait for a long-lasting finish!
Post-Painting Checklist
You’re almost done! A few final checks ensure your chair is ready for many seasons of enjoyment:
- Did the paint cure for the recommended time?
- Are there any missed spots or uneven areas?
- Do you need to add felt pads to chair feet to protect surfaces?
- Consider a clear sealant if your paint doesn’t have one built-in.
- Are all your tools cleaned and stored properly?
Following these steps will give you a beautifully painted outdoor lounge chair. It’s a project that offers both satisfaction and a refreshed outdoor living space.
Conclusion
You’ve seen that painting an outdoor lounge chair is a rewarding project. With the right preparation, supplies, and patience, you can achieve professional-looking results. We covered everything from cleaning and sanding to choosing the perfect outdoor paint for your material.
Remember that thin coats and proper curing time are essential for durability. By following these steps, you’re not just painting a chair; you’re extending its life and revitalizing your outdoor living space. Go ahead, give your furniture that much-needed refresh and enjoy the compliments!
Frequently Asked Questions
How long does painted outdoor furniture typically last?
The lifespan of your painted outdoor furniture depends on several factors. Good prep work, high-quality outdoor paint, and proper curing can help it last 3-5 years or even longer. Exposure to harsh weather will also affect its durability.
Can I paint outdoor fabric on my lounge chair?
Painting outdoor fabric is possible with specialized fabric paints. However, it can alter the fabric’s feel and breathability. For best results, we recommend replacing the fabric if it’s removable, or using fabric-specific spray dyes for a softer finish.
What if my chair has peeling paint already?
If your chair has peeling paint, you must remove it completely before repainting. Scrape away all loose paint with a wire brush or paint scraper. Then, sand the surface smooth to ensure the new paint adheres properly and lasts longer.
Do I need to prime every type of outdoor chair?
While not always strictly necessary, priming is almost always a good idea for outdoor furniture. It creates a better adhesion surface, blocks stains, and can improve the vibrancy of your topcoat. Always prime bare wood, metal, or some plastics.
Can I use interior paint for my outdoor lounge chair?
No, you should never use interior paint on an outdoor lounge chair. Interior paints are not formulated to withstand UV rays, moisture, and extreme temperatures. They will fade, crack, and peel quickly when exposed to outdoor elements.
