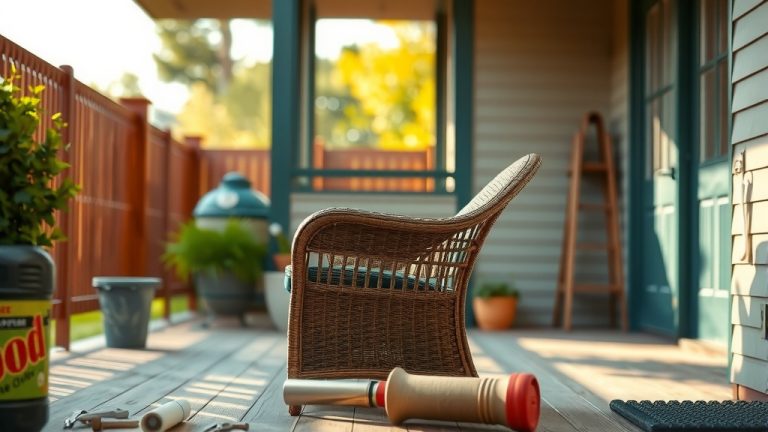
How To Restring A Patio Chair?

To restring a patio chair, you typically start by removing the old, worn lacing, cleaning the frame, and then carefully weaving new lacing material through the chair’s frame until it’s taut and secure.
This process gives your outdoor furniture a fresh look and extends its lifespan, allowing you to enjoy your patio chair for many more seasons.
- You can easily restore your patio chair by replacing its old lacing yourself.
- Gathering the right tools and materials upfront makes the job much smoother.
- Learning a simple weaving pattern will help you achieve a professional-looking finish.
- Taking your time ensures the lacing is properly tensioned and secured.
- This DIY project saves money and brings new life to your outdoor space.
How To Restring A Patio Chair?
Restringing a patio chair involves removing the old straps, cleaning the frame, and then carefully weaving new lacing into the chair’s design.
This process refreshes your outdoor seating, making it comfortable and stylish once more.
Do you look at your tired patio chairs and wish they had their old charm back? Perhaps the webbing is sagging, torn, or just faded. You are not alone! Many homeowners face this common outdoor furniture challenge. The good news is that restoring these chairs is a rewarding and relatively simple DIY task. It’s like giving your beloved chair a fresh start.
Why Restring Your Patio Chair?
Giving your patio chair new lacing offers many benefits. First, it saves you money compared to buying brand new furniture. Plus, you get to keep that favorite, comfortable chair you already love.
Secondly, it lets you personalize your space. You can choose new colors or patterns for the lacing to match your current outdoor decor. Imagine how a vibrant new color could instantly brighten your patio! Research shows that maintaining outdoor furniture can significantly extend its useful life (Consumer Reports).
Gathering Your Tools and Materials
Before you begin, gathering everything you need will prevent frustrating stops. Think of it like preparing for a fun cooking project; having all ingredients ready makes it much easier. You’ll want a clear, open workspace too.
Here’s a handy checklist:
- New patio chair lacing (vinyl, nylon, or polyester)
- Sharp utility knife or strong scissors
- Measuring tape
- Pliers (needle-nose or regular)
- Screwdriver (if needed for frame parts)
- Rubbing alcohol and a clean cloth
- Ruler or straight edge
- Small clamps (optional, but helpful)
Choosing the Right Lacing
Selecting the correct lacing material is important for durability and look. Vinyl lacing is a popular choice because it’s weather-resistant and comes in many colors. Nylon or polyester lacing can also work well, offering good strength and flexibility.
We found that checking the original lacing type on your chair often guides your choice for the best replacement. Many experts say to consider UV resistance for longer-lasting color (Patio Furniture Journal).
Safety First!
Before you start cutting or pulling, always think about safety. A sharp utility knife can slip, so wear sturdy work gloves to protect your hands. Ensure your workspace is well-lit and free of clutter to avoid trips and falls.
It’s a simple step, but one that keeps your project enjoyable and injury-free. Just like any home improvement, a little caution goes a long way.
Step-by-Step Guide to Restringing
This part is where the magic happens! We’ll walk through each stage of replacing your patio chair lacing. Don’t worry if it feels a bit daunting at first; just take it one step at a time. It’s very much like following a recipe.
Preparing the Chair
First, clean your chair frame thoroughly. Use a damp cloth and mild soap to remove dirt, grime, and any old adhesive. Let it dry completely. Also, inspect the frame for any loose screws or weak spots and tighten or repair them. A clean, sturdy frame is the best foundation for new lacing.
Removing the Old Lacing
Carefully cut away all the old, worn lacing with your utility knife or strong scissors. Be mindful not to scratch the chair frame. As you remove it, pay attention to how the old lacing was woven. This can be a helpful guide for your new pattern. It’s like clearing the canvas before painting a masterpiece.
Measuring for New Lacing
This step is critical to ensure you have enough material. Many experts suggest measuring the entire length of the old lacing if possible. If not, measure the length of one section of old lacing that spans the chair’s width or length. Then, multiply this by the number of sections you’ll be weaving. Add about 15-20% extra to be safe.
We found that having too much lacing is better than running short mid-project. A good rule of thumb is roughly 2-3 times the total perimeter of the area you are lacing (DIY Network).
Starting the New Weave
Begin by securing one end of the new lacing to the chair frame. You can often thread it through an existing hole or around a bar, securing it with a knot or a small screw if your chair design allows. Make sure this starting point is tight and hidden. This initial anchor point sets the tone for the entire project.
The Weaving Process
Now for the fun part: weaving! There are many patterns, but a simple over-under weave is common and looks great. Maintain consistent tension as you thread the lacing through the frame’s holes or around its bars. Keep your rows straight and evenly spaced for a neat appearance.
Here’s a look at common weaving patterns:
| Pattern Type | Description | Best For |
|---|---|---|
| Plain Weave (Over-Under) | Each strand goes over one, then under one, alternating rows. | Simple, durable, classic look. |
| Basket Weave | Strands go over two, then under two, creating a checkerboard. | More structured, wider lacing. |
| Diagonal Weave | Lacing crosses at an angle, often creating diamond shapes. | Decorative, unique texture. |
Securing the Ends
Once you reach the end of your weaving, you need to secure the lacing tightly. Just like the start, thread the end through a hole or around a bar. Use pliers to pull it as taut as possible. Tie a secure knot or use a small screw to hold it in place. Trim any excess lacing neatly. You want it to look polished and finished, without loose ends.
Common Mistakes to Avoid
As you work, keep an eye out for a few common pitfalls. First, avoid making the lacing too loose; it will sag quickly. Conversely, don’t pull it so tight that it distorts the frame. Another common error is mixing different types of lacing, which can lead to uneven wear. Consistency is key for a lasting repair.
Many guidelines point to maintaining even tension as a good first step for success (Patio Living). Rushing the job often leads to needing to redo sections later.
Maintenance Tips for Your Newly Restrung Chair
Congratulations, you’ve restrung your chair! Now, keep it looking great. Regularly wipe down the lacing with a damp cloth to remove dirt. Avoid harsh chemicals, which can degrade the material. If possible, store your chairs under cover during harsh weather to protect the lacing from extreme sun or cold.
A little care goes a long way in preserving your hard work. We found that routine cleaning helps prevent premature wear and tear (Gardening Know How).
Conclusion
Restringing a patio chair is a practical and satisfying DIY project that truly breathes new life into your outdoor living space. It’s more than just a repair; it’s an opportunity to extend the life of cherished furniture and add a personal touch to your patio. With a few simple tools, careful attention to detail, and a bit of patience, you can transform your tired chairs into comfortable, inviting seating once again. So, why not give it a try and enjoy your beautifully restored patio furniture?
How much lacing do I need to restring a patio chair?
You generally need about 2-3 times the total perimeter of the area you are lacing on the chair. It’s always a good idea to add an extra 15-20% to that measurement to ensure you have enough material, just in case.
Can I use any type of material to restring my patio chair?
While you can use various materials, it’s best to choose outdoor-grade lacing like vinyl, nylon, or polyester. These materials are designed to withstand weather conditions, UV rays, and general outdoor use, making your repair last longer than indoor fabrics.
How do I prevent the new lacing from sagging after some time?
To prevent sagging, ensure you pull the lacing as taut as possible during the weaving process. Consistent, firm tension across all strands is key. Also, securing both ends of the lacing firmly and correctly will help maintain tightness over time.
What if my patio chair frame has no pre-drilled holes for lacing?
If your chair frame lacks pre-drilled holes, you might need to wrap the lacing around the frame bars themselves, or consider using small clamps or screws in discreet locations to secure the lacing ends. Some designs rely on wrapping techniques rather than threading through holes.
Is it better to remove all the old lacing at once or section by section?
It’s usually best to remove all the old lacing at once after taking a photo or mental note of its original pattern. This allows you to thoroughly clean the frame and gives you a fresh start. However, if the pattern is very complex, removing it section by section might help you remember the original design more easily.