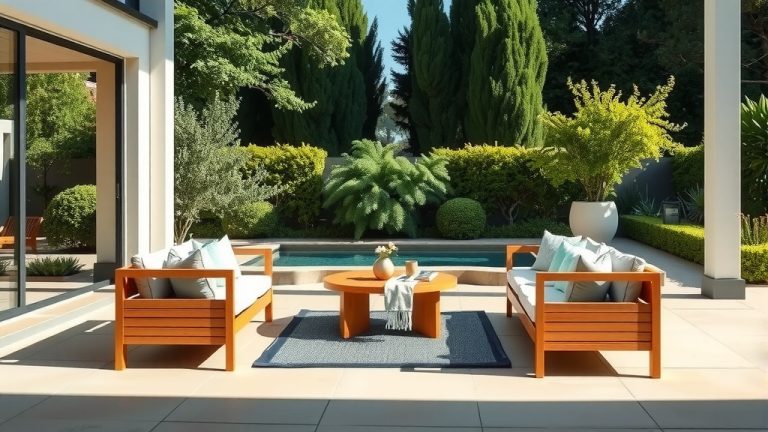
How To Restore Metal Patio Furniture?
To restore metal patio furniture, you need to clean it thoroughly, remove all rust, sand the surfaces smooth, apply a rust-inhibiting primer, and then finish with weather-resistant outdoor paint.
This process protects against further corrosion and gives your outdoor pieces a fresh, new appearance, extending their lifespan for many more seasons of enjoyment.
Here’s a quick overview of how to restore metal patio furniture:
- Assess your furniture’s condition to see if it’s a good restoration candidate.
- Gather essential tools like wire brushes, sanders, cleaners, primers, and paint.
- Clean the furniture deeply to remove grime and loose paint.
- Address all rust spots, from light surface rust to deeper patches.
- Apply primer and a fresh coat of outdoor-grade paint.
- Finish with a protective sealant to make your efforts last.
How To Restore Metal Patio Furniture?
Restoring metal patio furniture transforms old, weathered pieces into garden showpieces. You can revitalize your outdoor space and save money doing it.
This guide walks you through each step, making the process straightforward and rewarding. Let’s give your furniture a new lease on life.
Is Your Furniture Worth Saving?
Before you begin, take a good look at your furniture. Is it structurally sound?
Minor dents, surface rust, or fading paint are simple fixes. However, if frames are bent or joints are severely rusted through, replacement might be a better choice.
We found that items with sentimental value or unique designs are often worth the effort.
Gathering Your Restoration Tools
Having the right tools makes all the difference. Think of it like cooking; you need your ingredients ready.
A little preparation here saves lots of time and frustration later. You likely have many of these items already.
Cleaning Supplies
You’ll need warm water, dish soap, a stiff brush, and some rags. A power washer can be incredibly helpful for removing loose paint and stubborn dirt.
Safety goggles and gloves are always a good idea when cleaning or sanding.
Rust Removal Tools
For rust, arm yourself with a wire brush, sandpaper (various grits from 80 to 220), and possibly a drill with a wire wheel attachment. Rust converter products can also save you elbow grease.
Many experts say to always start with the least abrasive method first (OSHA guidelines suggest protective gear).
Painting & Protection Gear
You’ll need painter’s tape, plastic sheeting, rust-inhibiting primer, and outdoor metal paint. Consider a clear topcoat for extra durability. Paintbrushes, rollers, or a spray gun will help you apply finishes smoothly.
Don’t forget a respirator mask for painting; fumes can be strong.
The Restoration Process: Step-by-Step
Now that you have your tools, it’s time to get to work. Remember, patience is your best friend here.
Each step builds on the last, ensuring a beautiful, lasting finish. Let’s make that old furniture shine again.
Step 1: Clean Thoroughly
Start by washing your furniture with warm soapy water and a stiff brush. This removes dirt, grime, and loose paint flakes. Rinse thoroughly and let it dry completely.
Any remaining moisture can trap rust underneath your new paint. We found that a few hours in the sun works wonders.
Step 2: Tackle the Rust
This is where the real transformation begins. Rust is the enemy of metal furniture, so let’s banish it.
Be systematic and check every nook and cranny. You’ll be glad you did.
Light Rust
For minor rust spots, a wire brush or medium-grit sandpaper (around 120-grit) usually does the trick. Scrub until the rust is gone and you see bare metal.
Wipe away any dust after you finish each section.
Heavy Rust
Stubborn, flaky rust needs more force. Use a drill with a wire wheel or a stronger wire brush. You might also try a rust converter, which chemically changes rust into a paintable surface.
Always follow product instructions when using chemical treatments (Environmental Protection Agency advice is to dispose of chemicals safely).
Step 3: Sanding and Priming
Smooth surfaces are key to a professional-looking finish. Sanding creates a surface for the paint to grip.
Priming then seals the metal and blocks new rust from forming. This step is critical.
Prepping for Paint
After rust removal, lightly sand all metal surfaces with fine-grit sandpaper (220-grit). This smooths out any rough spots and helps the primer stick. Wipe down with a tack cloth to remove all sanding dust.
Mask off any areas you don’t want to paint, like plastic glides or wooden accents.
Apply Primer
Apply one to two thin, even coats of a rust-inhibiting metal primer. This is often called “rust-proof” primer. Allow each coat to dry completely according to the manufacturer’s instructions.
Primer ensures a durable bond for your final paint coats.
Step 4: Painting for a New Look
This is the fun part, where your furniture truly gets its makeover. Choosing the right paint is important.
Think about the color and finish you desire. Do you want a classic black or a bold, vibrant hue?
Choosing the Right Paint
Selecting the correct paint makes all the difference for longevity. Outdoor metal paints are formulated to withstand weather. We found these common choices:
| Paint Type | Pros | Cons |
|---|---|---|
| Oil-Based Enamel | Durable, good coverage, strong protection. | Slower drying, can be harder to clean brushes. |
| Acrylic Latex (Outdoor) | Faster drying, easier cleanup, flexible finish. | May require more coats for full coverage. |
| Rust-Preventative Spray Paint | Quick and easy application, smooth finish. | Can be tricky in windy conditions, less control. |
Application Tips
Apply your chosen paint in thin, even coats. Multiple thin coats are better than one thick coat, preventing drips and ensuring a smooth finish.
Follow the drying times between coats. You might need two to three coats for full coverage and depth of color.
Step 5: Protecting Your Work
You’ve done the hard work, so let’s make it last. A clear topcoat adds an extra layer of defense against the elements.
This step truly seals the deal for your newly restored furniture.
Once your final paint coat is dry, consider applying a clear, UV-resistant sealant. This will help protect the paint from fading in the sun and add another barrier against moisture.
You can find these in spray or brush-on forms. Allow it to cure fully before use.
Common Metal Types and Their Care
Different metals have slightly different needs, but the core restoration steps remain similar. Knowing your metal helps with specific issues.
A little knowledge about material composition can guide your choices.
Wrought Iron
Known for its strength and decorative scrollwork, wrought iron is prone to rust if not protected. Regular cleaning and prompt touch-ups of scratches are important.
Its weight means it’s less likely to blow away in a storm.
Aluminum
Aluminum is lightweight and naturally rust-resistant, making it a popular choice. However, it can corrode, showing a white, powdery residue.
Sanding and priming still help adhesion, but rust removal is rarely a major step here.
Steel
Steel furniture is sturdy but very susceptible to rust if its protective coating is compromised. It often requires more diligent rust removal than aluminum.
Regular maintenance is important for steel to prevent severe deterioration.
Maintenance Tips for Lasting Beauty
Your restored furniture looks amazing, right? Now, let’s keep it that way!
A little routine care goes a long way. Consider these quick tips:
- Clean regularly: Wipe down furniture weekly with mild soap and water.
- Cover when not in use: Use outdoor furniture covers during harsh weather or off-season.
- Touch up scratches: Address any nicks or scratches promptly with matching paint to prevent rust.
- Store indoors: If possible, bring your furniture indoors during winter months.
- Inspect seasonally: Check for any signs of rust or wear at the start and end of each patio season.
Conclusion
Restoring metal patio furniture is a rewarding project that extends the life of your cherished outdoor pieces. You save money and help the environment by giving items a second chance.
With careful cleaning, rust removal, priming, and painting, your furniture can look brand new again. Enjoy your revitalized outdoor oasis!
Can I restore badly rusted metal patio furniture?
Yes, you often can restore badly rusted metal furniture. The key is to remove all loose and flaky rust completely, down to bare metal, before applying a rust-inhibiting primer and paint. If the rust has eaten through the metal causing structural weakness, replacement might be a safer option.
What is the best type of paint for outdoor metal furniture?
The best type of paint is typically an oil-based enamel or a high-quality outdoor acrylic latex specifically formulated for metal. Many experts recommend rust-inhibiting spray paints for ease of application and a smooth finish. Look for paints labeled “for outdoor use” or “rust-preventative.”
How long does metal patio furniture restoration last?
A well-executed metal patio furniture restoration can last for several years, often 3-5 years or more, depending on your climate and how well you maintain the furniture. Using a good quality primer, paint, and a clear topcoat, along with proper storage, extends the lifespan significantly.
Do I need to sand all the old paint off before repainting?
You don’t always need to sand off all the old paint, especially if it’s in good condition and adhering well. However, you must sand away any loose, peeling, or rusty paint. The goal is to create a smooth, clean surface for the new paint to bond to, so light sanding over existing, well-adhered paint is sufficient.
Can I restore aluminum patio furniture, and is it different from iron?
Yes, you can restore aluminum patio furniture, and the process is similar but often easier than iron. Aluminum does not rust like iron; instead, it might corrode, appearing as a white, powdery residue. You still need to clean, sand any corrosion, prime (especially for better paint adhesion), and paint with outdoor metal paint.