How to Remove Rust from Wrought Iron Furniture?
On this page (6 sections)
The best way to remove rust from wrought iron furniture is with a stiff wire brush and a bit of elbow grease. For tougher rust spots, you can use a rust remover solution, followed by a good scrub. Once clean, it’s important to protect your furniture to prevent rust from returning.
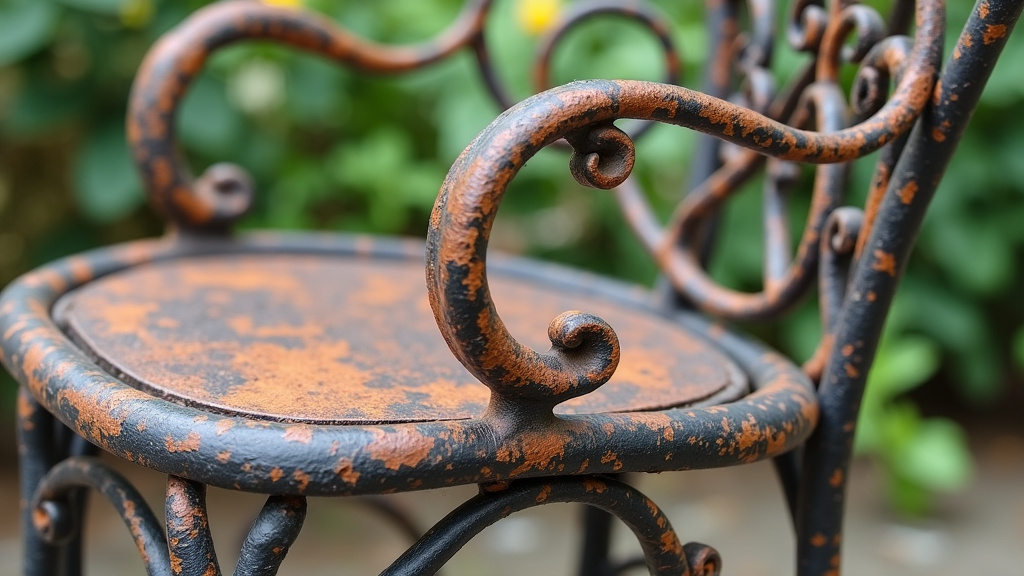
Your beautiful wrought iron pieces can suffer from rust, especially when exposed to the elements. Don’t worry, this is a common problem! With the right approach, you can restore them to their former glory. We found that a combination of cleaning methods and proper sealing is key to long-lasting results.
- Start with a wire brush.
- Use rust remover for stubborn spots.
- Wash and dry thoroughly.
- Apply a rust-inhibiting primer.
- Finish with outdoor paint.
Ready to give your wrought iron furniture a fresh new look? Let’s walk through exactly how to tackle that rust, step by step.
Tackling Rust on Your Wrought Iron Furniture
Rust can be a real eyesore on your beloved wrought iron furniture. But don’t fret! You can bring it back to life with a few simple steps. We found that combining the right tools and a little patience makes all the difference.
Gathering Your Rust-Fighting Arsenal
Before you start, make sure you have the right supplies. This will make the job much smoother. Having everything ready means you can tackle the rust without interruption.
Essential Tools for the Job
You’ll need a few key items to get this job done effectively. Think of these as your superhero tools against rust.
- A stiff wire brush is your first line of defense.
- For tougher spots, consider steel wool (medium or fine grade).
- Gloves are a must to protect your hands.
- Safety glasses will shield your eyes from flying rust particles.
- A drop cloth or old sheets to protect the surrounding area.
- Cleaning cloths or rags for wiping down.
- A bucket of soapy water (mild dish soap works well).
Optional, But Helpful, Rust Removers
Sometimes, a simple scrub isn’t enough. For those stubborn areas, a dedicated rust remover can be a lifesaver. We found that many commercial rust removers are quite effective.
These come in various forms, like sprays or gels. Always read the product instructions carefully. Some require a bit of dwell time to work their magic.
You can also make your own solutions. White vinegar or lemon juice are often cited as natural alternatives. They contain mild acids that can help dissolve rust. We found that for light rust, these can be surprisingly effective.
The Step-by-Step Rust Removal Process
Now, let’s get down to business. Follow these steps for the best results. It’s like giving your furniture a spa day, but with more scrubbing!
Step 1: Prepare Your Workspace and Furniture
First, find a well-ventilated area. Outdoors is usually best. Lay down your drop cloth or old sheets. This protects your lawn or patio from dust and rust debris.
Give your furniture a quick rinse with water. This removes any loose dirt or debris. Let it dry completely before you start scrubbing. A clean surface makes the rust removal process more efficient.
Step 2: The Initial Scrub-Down
Grab your stiff wire brush. Start scrubbing the rusted areas. Use firm, back-and-forth strokes. You want to loosen and remove as much surface rust as possible.
Don’t be afraid to apply some pressure. If the rust is thick, you might need to do this for a while. We found that focusing on one section at a time helps prevent overwhelm.
Step 3: Tackling Stubborn Rust Patches
For rust that’s more deeply ingrained, it’s time to bring out the heavy hitters. If you’re using steel wool, gently rub the affected areas. Be careful not to scratch the paint if there’s any left.
If you opted for a commercial rust remover, follow the product’s directions. Typically, you’ll apply it to the rust spot and let it sit for a specified time. Then, scrub again with your wire brush or steel wool.
For DIY solutions like vinegar, soak a cloth in it. Place the soaked cloth directly on the rust spot. Let it sit for an hour or two. Then, scrub as usual. We found this method works well for moderately rusted areas.
Step 4: Cleaning and Rinsing Away the Residue
Once you’ve removed the bulk of the rust, it’s time to clean. Use your bucket of soapy water and a clean cloth. Wipe down all the areas you scrubbed. This removes any lingering rust particles and cleaner residue.
Rinse the furniture thoroughly with clean water. Make sure no soap or rust dust remains. A hose works great for this. You want a perfectly clean surface for the next steps.
Step 5: Thorough Drying is Key
This is a step you absolutely cannot skip. Moisture is rust’s best friend. Make sure your furniture is bone dry. Use clean, dry rags to wipe it down. You can even let it air dry in the sun for a few hours.
We found that a residual bit of moisture can undo all your hard work. Pay special attention to nooks and crannies where water might hide. A quick blast with a hairdryer can help in those tricky spots.
Protecting Your Wrought Iron Furniture for the Long Haul
You’ve done the hard work of removing the rust. Now, you need to protect your furniture to prevent it from coming back. This is where the real magic happens for longevity.
The Importance of a Rust-Inhibiting Primer
Think of primer as a protective shield. A rust-inhibiting primer is specifically designed to stop rust in its tracks. It creates a solid base for your paint.
Many experts recommend using a primer formulated for metal. Look for labels that specifically mention rust prevention or inhibition. We found that a good primer makes a huge difference in how long the paint lasts.
Apply a thin, even coat of primer. Make sure to cover all the areas you treated, plus a little beyond. Allow it to dry completely according to the product instructions. This drying time is crucial for its effectiveness (National Association of Corrosion Engineers).
Choosing the Right Topcoat Paint
Now for the finishing touch! You want a paint that will not only look good but also withstand the elements. Outdoor-specific paints are designed for this very purpose.
Look for paints that are durable and weather-resistant. Many people opt for spray paint for wrought iron furniture. It’s easy to apply and gets into all the nooks and crannies. However, a good quality brush-on exterior paint also works beautifully.
Consider the finish you want. Glossy finishes can be easier to clean, while matte finishes offer a softer look. Whatever you choose, apply at least two thin coats. Allow each coat to dry fully before applying the next. This creates a robust protective layer.
Applying Your Protective Coating: A Quick Checklist
Let’s recap the protection phase:
- Ensure furniture is perfectly clean and dry.
- Apply one thin, even coat of rust-inhibiting primer.
- Let primer dry completely.
- Apply your first coat of exterior paint.
- Allow paint to dry, then apply a second coat.
- Allow final coat to cure fully before use.
By following these steps, you’ll not only remove rust but also protect your beautiful wrought iron furniture for years to come. It’s a process, but the results are incredibly rewarding!
Conclusion
You’ve learned how to tackle rust on your wrought iron furniture, from gathering the right tools to applying protective coatings. Remember, consistent maintenance is key to keeping your pieces looking their best. By following these steps, you’ve not only removed the rust but also armed your furniture against future damage. Your next step is to schedule a regular check-in, perhaps seasonally, to reapply protective layers as needed. This simple habit will ensure your wrought iron remains a beautiful part of your outdoor space for years to come.
Frequently Asked Questions
Can I use a power drill with a wire brush attachment?
Yes, a power drill with a wire brush attachment can significantly speed up the rust removal process. Be sure to use a light touch and wear safety glasses, as it can be more aggressive than manual brushing and may scratch the metal if too much pressure is applied.
How often should I reapply protective paint to my wrought iron furniture?
You should inspect your wrought iron furniture annually, or more often if it’s in a harsh environment. Reapply primer and paint as needed, typically every 2-3 years, to maintain optimal protection against rust.
What’s the best way to clean wrought iron furniture after removing rust?
After removing rust, wash the furniture thoroughly with soapy water and rinse it well with clean water. Ensure it’s completely dry before applying primer and paint. This step is essential to remove any residue that could interfere with the new protective coatings.
Can I paint over light rust without removing it completely?
It’s generally not recommended to paint directly over rust. Even light rust needs to be removed as much as possible. Painting over rust will not stop its progression, and the paint will likely peel or flake off as the rust continues to spread underneath.
Are there any natural rust removers that work well?
Natural options like white vinegar or lemon juice can work for light rust. Soak a cloth in one of these solutions, apply it to the rusted area, let it sit for an hour or two, and then scrub with a wire brush. For tougher rust, commercial removers are often more effective.



