
How To Refurbish Wrought Iron Patio Furniture?
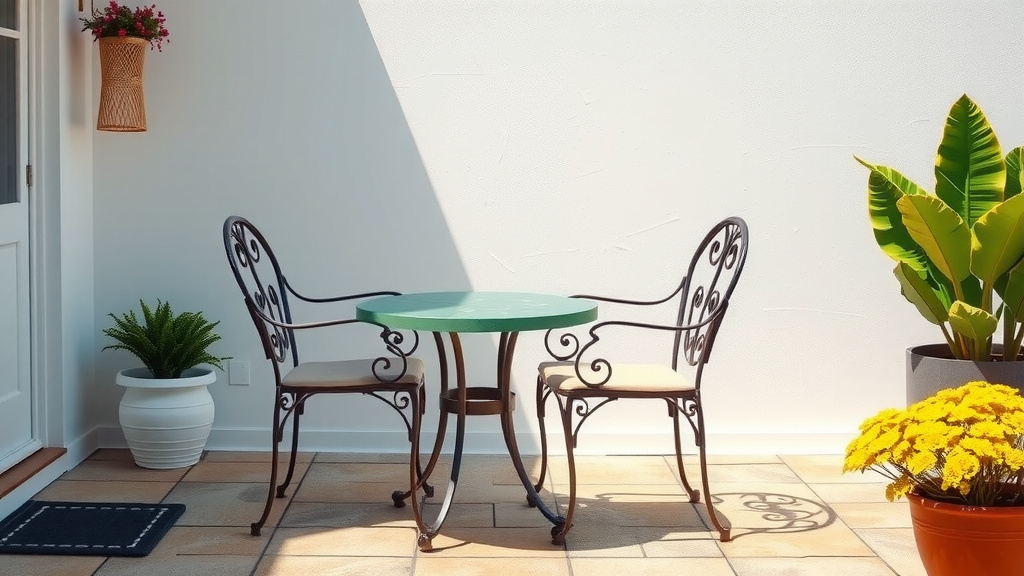
To refurbish wrought iron patio furniture, you typically begin by thoroughly cleaning the pieces, removing all rust through sanding or chemical treatments, and then applying a rust-inhibiting primer before finishing with several coats of durable outdoor paint.
This process restores both the appearance and structural integrity, extending the life of your beloved outdoor pieces with a bit of effort and the right materials.
For a quick overview of refurbishing your wrought iron patio furniture, here’s what you need to know:
- Start with a deep clean to remove dirt and grime.
- Address any rust with wire brushes, sandpaper, or chemical removers.
- Apply a rust-inhibiting primer to create a strong base.
- Paint with multiple thin coats of high-quality outdoor paint for durability.
- Consider a clear protective topcoat for extra longevity.
How To Refurbish Wrought Iron Patio Furniture?
Refurbishing wrought iron patio furniture transforms rusty, worn-out pieces into something beautiful again. This process involves careful cleaning, rust removal, priming, and painting.
It’s a rewarding project that can save you money and keep cherished furniture out of the landfill.
Why Bother Refurbishing Your Wrought Iron?
You might be wondering if it’s worth the effort. We found that refurbishing is often far more cost-effective than buying new furniture. Think of the savings!
Also, wrought iron is incredibly durable, so giving it a fresh coat of paint means it will last for many more years. It’s truly an investment in longevity and style.
Plus, you get the satisfaction of bringing a cherished item back to life. It feels good to create something beautiful with your own hands, doesn’t it?
Is Your Furniture a Good Candidate?
Before you dive in, take a good look at your furniture. Is it mostly surface rust, or are there big holes? Small patches of rust are usually easy to fix.
If you have severely corroded or structurally damaged pieces, you might need professional welding. But for most common wear and tear, a DIY refurbishment is totally doable.
Are the joints sturdy? Loose joints can sometimes be tightened, but heavily damaged frames might require more serious attention (NIH).
Gather Your Refurbishment Arsenal
Preparation is key, like gathering ingredients for a favorite recipe. You wouldn’t start baking without flour, right? Let’s get your supplies ready.
Here’s a simple checklist of what you’ll likely need:
- Safety glasses and gloves (always protect yourself!)
- Wire brush or steel wool
- Sandpaper (various grits, like 80-grit to 220-grit)
- Degreaser or mild dish soap
- Water hose and scrubbing brush
- Drop cloths or old newspapers
- Rust-inhibiting primer (spray or brush-on)
- Outdoor metal paint (spray paint is popular for ease)
- Clear protective topcoat (optional, but recommended)
- Mineral spirits or paint thinner for clean-up
Step-by-Step Refurbishment Guide
Ready to roll up your sleeves? Let’s walk through the steps together. It’s like giving your furniture a spa day, if spas involved a lot of sanding.
Step 1: The Initial Clean-Up
First, you need to clean the furniture thoroughly. Use a stiff brush or power washer to remove loose dirt, cobwebs, and any flaking paint. A good degreaser or even just dish soap and warm water will cut through grime.
Rinse everything well and let it dry completely. Any lingering moisture can cause new rust to form under your fresh paint, and we don’t want that!
Step 2: Battling the Rust Monster
This is where the real work begins. Rust is the enemy of wrought iron. You need to remove all visible rust before priming.
Use a wire brush, steel wool, or coarse-grit sandpaper (80-grit works well) for stubborn spots. For larger areas, an orbital sander with a sanding pad can save your arms. Some people use chemical rust removers, which can be very effective but require careful handling (CDC guidelines).
Here’s a quick comparison of rust removal methods:
| Method | Pros | Cons |
|---|---|---|
| Wire Brushing / Sanding | Cost-effective, good for surface rust, precise control. | Labor-intensive, dusty, may not reach all crevices. |
| Chemical Rust Removers | Less physical effort, reaches tight spots, dissolves rust. | Requires careful handling, can be messy, needs neutralization. |
| Angle Grinder with Wire Wheel | Very fast for large areas, aggressive rust removal. | Generates sparks, can damage metal if not careful, noisy. |
Always follow the manufacturer’s instructions for any chemical products, especially with rust removers. Safety first!
Step 3: Smoothing Things Over
Once the rust is gone, it’s time to smooth things out. Use finer-grit sandpaper (120-220 grit) to create a smooth surface for paint adhesion. Think of it as preparing a canvas for an artist.
After sanding, wipe down the furniture with a tack cloth or damp rag to remove all dust. Then, apply a rust-inhibiting primer. This step is non-negotiable! Primer creates a barrier against future rust and gives your topcoat something good to stick to. One or two thin coats should do it.
Step 4: The Perfect Paint Job
Now for the fun part: painting! Choose a high-quality outdoor metal paint designed for durability and weather resistance. Many experts say a good quality spray paint made for metal works wonders for wrought iron’s intricate designs.
Apply several thin, even coats rather than one thick one. This prevents drips and gives a much more professional finish. Let each coat dry according to the product instructions before applying the next. Patience is a virtue here!
Step 5: Protecting Your Investment
After your paint has fully cured (this might take a few days), consider adding a clear protective topcoat. This adds an extra layer of defense against scratches, UV rays, and moisture, keeping your beautiful finish looking new longer.
Tackling Loose Joints and Repairs
What if your chair wobbles? Loose joints are common in older furniture. For minor wobbles, you might find screws that need tightening. Some pieces might have riveted joints that have become loose.
We found that for a more secure fix, you can use strong metal epoxy or even have a local welder make repairs. Always ensure any repairs are solid before painting, as paint won’t fix a broken joint.
Mistakes to Avoid During Refurbishment
Everyone makes mistakes, but we can learn from them! A common pitfall is not removing all the rust. Any rust left behind will eventually bubble up through your new paint, ruining your hard work.
Another mistake is painting in direct sunlight or on a very humid day. This can cause the paint to dry too quickly or not cure properly, leading to an uneven or flaky finish (Cleveland Clinic recommendations for optimal drying conditions).
Also, don’t skip the primer! It’s the unsung hero of a lasting paint job.
Keeping Your Refurbished Furniture Looking Great
Your hard work isn’t over once the paint dries. Regular, light maintenance will keep your furniture shining. Simply wipe it down periodically with a damp cloth to remove dust and dirt.
Inspect for any new scratches or chips, and touch them up promptly to prevent rust from setting in. During harsh weather or off-season, covering your furniture or storing it indoors will significantly prolong its life.
Conclusion
Refurbishing your wrought iron patio furniture is more than just a DIY project; it’s a way to preserve memories and enjoy your outdoor space for years to come. By following these steps – cleaning, rust removal, priming, and painting – you can achieve professional-looking results.
With a little elbow grease and the right materials, you’ll transform those tired pieces into vibrant focal points for your patio. So, grab your tools and get ready to revitalize your outdoor living!
What kind of paint is best for wrought iron patio furniture?
The best paint for wrought iron patio furniture is an outdoor-grade metal paint, specifically one that offers rust inhibition. Many choose oil-based enamel paints or spray paints formulated for exterior metal surfaces because they provide excellent durability and weather resistance. Look for products that mention “rust-preventative” on the label.
How do I prevent rust from returning after refurbishing?
To prevent rust from returning, ensure you remove all existing rust thoroughly before priming. Use a high-quality rust-inhibiting primer, followed by several thin coats of durable exterior metal paint. A clear protective topcoat can add another layer of defense. Also, keep the furniture dry and touch up any chips or scratches immediately.
Can I refurbish wrought iron furniture without sanding?
You can refurbish wrought iron without extensive sanding if there is very minimal or no rust and the existing paint is sound. However, if rust is present or the old paint is flaking, sanding is crucial for proper adhesion and a long-lasting finish. Chemical rust removers can reduce the need for heavy sanding in rusted areas.
How long does the refurbishment process typically take?
The entire refurbishment process for a set of wrought iron patio furniture can take several days. This includes significant time for cleaning, rust removal, and especially for drying each coat of primer and paint. While active work might be a few hours per piece, the waiting periods for drying extend the overall project duration.
Is it better to spray paint or brush paint wrought iron?
Many experts prefer spray painting for wrought iron due to its intricate designs. Spray paint can reach into all the nooks and crannies, providing a smooth, even finish with less effort than brushing. However, brushing can offer a thicker coat and better control in windy conditions, but it requires more skill to avoid drips and achieve an even surface.
