
How To Refinish Wrought Iron Patio Furniture?
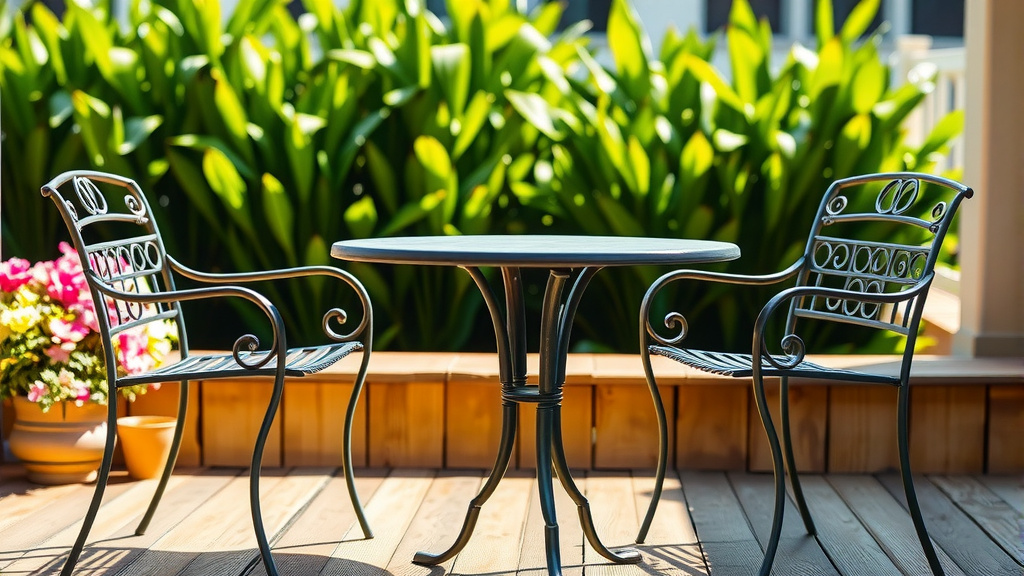
To refinish wrought iron patio furniture, you will typically clean the piece, remove any rust and loose paint, prime it with a rust-inhibiting primer, and then apply several coats of durable exterior paint for a refreshed look.
This process revitalizes old, weathered iron, extending its life and restoring its beauty with proper preparation and application techniques.
Here’s a quick overview of what you’ll find in this guide:
- You will learn the necessary steps to clean and prep your wrought iron.
- We will help you understand how to effectively remove rust and old paint.
- You’ll discover the best types of primers and paints for lasting results.
- We share tips for applying paint smoothly for a professional finish.
- Find out how to protect your newly refinished furniture for years to come.
How To Refinish Wrought Iron Patio Furniture?
Refinishing wrought iron patio furniture means giving it a new life. This involves cleaning, rust removal, priming, and painting to restore its original charm and durability.
Why Refinish Your Wrought Iron Furniture?
Wrought iron furniture is built to last, often becoming a family heirloom. Over time, sun, rain, and humidity can cause it to show its age, leading to rust and chipped paint.
Refinishing isn’t just about making it look nice again. It’s also about protecting the metal from further decay. Think of it as giving your beloved outdoor pieces a spa day (NIH).
Is It Worth the Effort for You?
You might wonder if the time and effort are truly worth it. Replacing a full wrought iron set can be very expensive. Refinishing offers a cost-effective alternative.
Many experts say that a good refinishing job can make your furniture look brand new. It also adds years to its lifespan, preserving your investment (Cleveland Clinic).
Gathering Your Essential Tools and Materials
Before you get started, having the right supplies makes the job much smoother. You wouldn’t build a house without a hammer, right? The same goes for this project.
We found that having everything ready prevents frustrating interruptions. Take a moment to check your garage or make a list for the hardware store.
Your Refinishing Checklist
- Wire brush or steel wool
- Sandpaper (various grits, 80-220)
- Drop cloths or old newspapers
- Safety glasses and work gloves
- Mild detergent and water
- Rust converter or rust remover
- Metal primer (rust-inhibiting)
- Exterior metal paint (spray or brush-on)
- Paint thinner (for oil-based paint cleanup)
- Optional: Tack cloth, painter’s tape
Preparation: The Foundation of a Great Finish
This stage is arguably the most important. A poor prep job will show through your beautiful new paint. It’s like building on sand – it won’t hold up.
Many experts say that proper surface preparation accounts for 70% of a successful painting project. Don’t rush this part!
Thorough Cleaning is a Must
Start by giving your furniture a good wash. Use a mild detergent and water to remove dirt, grime, and any cobwebs. A stiff brush helps with stubborn spots.
Rinse the furniture completely with a hose. Let it dry fully in the sun, or wipe it down with old towels. Any moisture left behind can cause issues later.
Dealing with Rust: The Iron Enemy
Rust is the main culprit for damaged wrought iron. Use a wire brush or steel wool to scrub away all visible rust. Don’t be shy; get into every nook and cranny.
For tougher rust spots, a sanding attachment on a drill can save your hands. We found that using a rust converter after cleaning can chemically treat remaining rust, turning it into a stable, paintable surface.
Sanding for Smoothness
Once rust is gone, it’s time to smooth things out. Use 80-grit sandpaper to remove any loose or peeling paint. Follow up with a finer grit, like 120 or 180, for a smoother finish.
The goal is to create a slightly rough surface. This texture helps the new paint adhere better. Wipe away all dust with a tack cloth or damp rag.
Choosing the Right Paint for Longevity
The type of paint you choose directly impacts how long your refinished furniture will last. You wouldn’t use indoor paint outside, would you? The elements are harsh.
We found that high-quality exterior paints formulated for metal offer the best protection and finish. Don’t skimp here; it’s worth the small extra cost.
Primer First, Always
Always start with a good primer. A rust-inhibiting metal primer is non-negotiable for wrought iron. It creates a protective barrier and ensures your topcoat sticks.
Apply one even coat of primer. Allow it to dry completely according to the manufacturer’s instructions. Patience is a virtue in painting!
Topcoat Options: Spray vs. Brush
You have two main choices for your topcoat: spray paint or brush-on paint. Both have pros and cons.
| Application Method | Pros | Cons |
|---|---|---|
| Spray Paint | Fast, even coverage, good for intricate designs. | Can be messy, requires good ventilation, less durable per coat. |
| Brush-on Paint | More control, thicker, more durable coats. | Slower, brush strokes can be visible, harder for detailed areas. |
Many experts say that spray paint is ideal for beginners. It helps achieve a smoother, factory-like finish. Just be sure to use many light coats instead of one heavy one.
The Painting Process: Bringing it to Life
With preparation done and paint chosen, you’re ready for the fun part! This is where you see your furniture transform before your eyes.
Remember those light, even coats we talked about? They are the secret to a professional-looking finish. Rushing here can lead to drips and uneven color.
Best Application Methods
If using spray paint, hold the can about 6-10 inches from the surface. Use a sweeping motion, moving continuously to avoid puddles. Overlap each pass slightly.
For brush-on paint, use a good quality synthetic brush. Apply thin, even strokes, working in small sections. Always try to paint in one direction.
Multiple Coats for Durability
One coat is rarely enough for outdoor furniture. Aim for at least two to three thin coats of your chosen exterior paint. Allow each coat to dry fully before applying the next.
This layering builds up a strong, protective shield against the elements. It’s like putting on layers of clothing to stay warm; each layer adds protection.
Protection for the Future: Maintaining Your Finish
Your hard work shouldn’t go to waste. A little ongoing care will keep your refinished wrought iron looking fantastic for years to come. Think of it as a small investment in its future.
We found that simple preventative measures save you from doing a major refinishing job again too soon. It’s about being proactive, not reactive.
Regular Cleaning and Touch-Ups
Wipe down your furniture periodically with a damp cloth to remove dirt and pollen. If you notice any small chips or scratches, touch them up quickly.
A small bottle of matching paint can be a lifesaver. This prevents moisture from getting under the paint and starting new rust spots.
Common Mistakes to Avoid
Even seasoned DIYers can make small errors. Knowing what to watch out for helps you avoid them completely. It’s like having a cheat sheet for success!
- Not cleaning thoroughly: Any dirt or grease will prevent paint adhesion.
- Ignoring rust: Painting over rust just hides it; it will eventually return.
- Skipping primer: Primer is crucial for adhesion and rust prevention.
- Applying thick coats: Leads to drips, uneven drying, and peeling.
- Not drying completely: Trapped moisture causes bubbles and peeling.
- Painting in humidity: High humidity can affect drying time and finish quality.
When to Call a Pro?
Sometimes, a DIY project might be beyond your current skill level or time constraints. That’s perfectly okay. Knowing when to call in an expert is a smart move.
If your wrought iron is severely rusted, has intricate damage, or if you simply don’t have the time, a professional may be a good option. They often have access to sandblasting equipment and specialized paints.
Conclusion
Refinishing your wrought iron patio furniture is a rewarding project. It transforms old, tired pieces into beautiful, functional works of art once again. By carefully following the steps — from thorough cleaning and rust removal to priming and painting — you ensure a durable and attractive finish.
Remember, patience and attention to detail are your best tools. The result is not just revitalized furniture, but also the satisfaction of knowing you did it yourself, extending the life and beauty of your outdoor living space for many more seasons.
How often should I refinish wrought iron patio furniture?
Many experts say that refinishing is generally needed every 5-10 years, depending on your climate and how well the furniture is maintained. Regular cleaning and prompt touch-ups can extend this time.
Can I refinish wrought iron furniture without removing all the old paint?
You don’t always need to remove every speck of old paint. If the old paint is adhering well and isn’t peeling or chipping, you can sand it to create a rough surface for the new primer and paint to stick to. Always remove loose or flaky paint.
What kind of primer is best for wrought iron?
A rust-inhibiting, oil-based metal primer is typically best for wrought iron. We found that these primers provide superior protection against rust and create an excellent base for your topcoat. Look for labels that specifically mention rust prevention.
Is it better to use spray paint or brush-on paint for wrought iron?
Both spray paint and brush-on paint work well. Spray paint offers a smoother, more even finish, especially for intricate designs, but requires more coats. Brush-on paint typically provides a thicker, more durable coat per application and offers more control.
How long does the refinishing process usually take?
The entire refinishing process can take anywhere from 2-4 days, mostly due to drying times between coats. Actual working time might be 8-16 hours, depending on the size and number of furniture pieces you are tackling.


