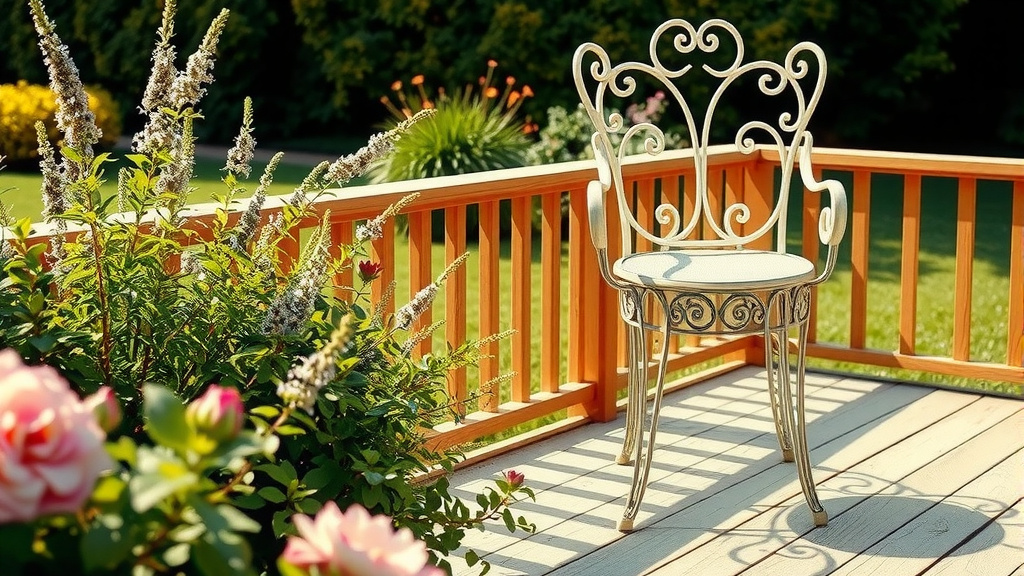
How To Paint Wrought Iron Patio Furniture?
To paint wrought iron patio furniture, start by thoroughly cleaning and sanding the surface to remove rust and old paint, then apply a rust-inhibiting primer.
Finish with two thin coats of exterior-grade metal paint, ensuring each coat dries completely for a durable, beautiful result.
Here’s a quick overview of how to give your wrought iron furniture a fresh new look:
- Prepare the Surface: Clean, scrub, and sand away rust and old paint.
- Prime for Protection: Apply a rust-inhibiting primer to prevent future corrosion.
- Paint with Precision: Use exterior metal paint in thin, even coats for best adhesion.
- Ensure Longevity: Proper prep makes your paint job last for years.
How To Paint Wrought Iron Patio Furniture?
Painting wrought iron patio furniture means refreshing its look and protecting it from the elements. This guide will walk you through each step to achieve a professional, lasting finish.
Why Bother Painting Your Wrought Iron?
You love your wrought iron furniture, don’t you? It’s sturdy and classic. Over time, though, even the strongest pieces can show wear.
Painting isn’t just about looks. It’s also about extending the life of your furniture. A fresh coat acts like a shield against rust and weather damage.
Think of it as giving your beloved outdoor pieces a much-needed spa day and a fresh wardrobe.
Gathering Your Painting Arsenal
Before you dive in, let’s talk about what you’ll need. Having the right tools makes all the difference. You wouldn’t build a house without proper tools, would you?
Essential Cleaning Supplies
You’ll need warm water, dish soap, and a stiff brush. A degreaser can be very helpful too. These items will get rid of dirt and grime.
Rust Removal Tools
Rust is the enemy here. Grab a wire brush, sandpaper (various grits like 80 and 120), and maybe a rust-removing solution. Some even use a drill with a wire brush attachment for tougher spots.
Primers That Stick
This is where rust protection starts. Look for a rust-inhibiting metal primer. Many experts say a good primer creates a strong bond for your paint.
Top Coats for Outdoors
Choose an exterior-grade metal paint. Brands like Rust-Oleum or Krylon offer many options. We found that oil-based paints generally stand up well to outdoor conditions.
Safety First Gear
Always protect yourself. Wear gloves, safety glasses, and a respirator mask. Paint fumes can be strong, and you don’t want rust particles in your eyes.
Step-by-Step Guide to a Flawless Finish
Now that you have your supplies, let’s get painting. We’ll break it down into simple, manageable steps.
Step 1: Cleaning is Key
First, clean your furniture thoroughly. Use warm, soapy water and a stiff brush. Scrub away all dirt, grease, and loose paint.
Rinse with clean water and let it dry completely. Any moisture left behind can cause issues later.
Step 2: Tackle That Rust
This part is critical. Use a wire brush or sandpaper to remove all visible rust. Don’t skip any spots. You want a smooth, rust-free surface.
Some smaller, tighter areas might need a Dremel tool or a small wire brush. Research shows that leaving rust behind can cause paint to peel later (NACE International).
Step 3: Sanding for Smoothness
Once rust is gone, lightly sand the entire piece. Use 120-grit sandpaper to rough up the surface. This creates tooth for the primer to grip.
Wipe down with a tack cloth or damp rag to remove sanding dust. Dust makes a terrible base for paint.
Step 4: Time to Prime
Apply one thin, even coat of rust-inhibiting primer. Read the manufacturer’s instructions for drying times. Don’t rush this step.
Primer ensures better adhesion and adds a vital layer of rust protection. Many experts say two thin coats of primer are better than one thick one for maximum protection.
Step 5: The Painting Process
Once the primer is dry, apply your first coat of exterior metal paint. Keep your strokes even and light. Avoid thick globs of paint.
Allow the first coat to dry completely. Then, apply a second thin coat. Two thin coats are always better than one thick, uneven coat for durability and appearance.
Step 6: Curing and Care
Let your furniture cure for several days before using it. This allows the paint to harden fully. Check the paint can for specific curing times.
Bring your freshly painted furniture into a protected area if bad weather is expected. You want that paint to set properly.
Brush, Spray, or Roller? Choosing Your Method
How you apply the paint can affect the finish. Each method has its pros and cons. Think about your comfort level and the furniture’s design.
| Method | Pros | Cons |
|---|---|---|
| Brush | Excellent control, good for details, thick coating | Slower, brush strokes visible, can drip if overloaded |
| Spray Can | Fast, even finish, reaches tight spots, no clean-up | Less control, overspray, more expensive per coverage |
| Paint Sprayer | Very fast, smooth factory-like finish, good coverage | Expensive equipment, requires practice, extensive masking needed |
Common Painting Pitfalls to Avoid
Even seasoned DIYers can make mistakes. Watch out for these common issues to keep your project on track:
- Not cleaning enough: Dirt and grease prevent paint from sticking.
- Skipping primer: No primer means rust might return quickly.
- Painting in humid weather: High humidity can cause paint to dry slowly or bubble.
- Applying thick coats: This leads to drips, unevenness, and longer drying times.
- Ignoring drying times: Rushing between coats can ruin your finish.
Making Your Paint Last Longer
You’ve put in the effort, so how do you make your beautiful paint job last? A little ongoing care goes a long way.
We found that storing furniture under cover during harsh weather can dramatically extend its life. Rain, snow, and intense sun can wear down paint quickly.
Regular light cleaning with mild soap and water also helps. Avoid harsh chemicals that could strip the paint. A quick touch-up of small chips can prevent rust from spreading.
Conclusion
Painting your wrought iron patio furniture is a rewarding project. It brings new life to old pieces and protects your investment. With proper preparation and careful application, you can achieve a durable and stunning finish.
Remember, patience is your best tool. Take your time with each step, and you’ll enjoy your rejuvenated outdoor living space for many seasons to come. You’ve got this!
How often should I repaint wrought iron patio furniture?
Most experts suggest repainting wrought iron furniture every 2-5 years. This depends on your local climate and how much sun and rain your furniture receives. Keeping an eye out for chipping paint or new rust spots can also guide your decision.
Can I paint wrought iron furniture without sanding?
While some “paint and primer in one” products exist, skipping sanding is generally not recommended, especially if rust is present. Sanding creates a profile for the new paint to adhere to, ensuring a much more durable and long-lasting finish.
What kind of paint is best for outdoor wrought iron?
For outdoor wrought iron, an exterior-grade, oil-based enamel paint designed for metal is usually best. Many options combine rust-inhibiting primer and paint. These products offer superior protection against weather and corrosion.
How do I prevent rust after painting?
The best defense against rust is a good offense during prep. Thoroughly removing all existing rust, applying a rust-inhibiting primer, and using a high-quality exterior paint are crucial steps. Also, consider storing furniture under cover during off-seasons to reduce exposure.
Can I use spray paint on wrought iron furniture?
Yes, spray paint is a popular choice for wrought iron due to its ability to reach intricate designs and provide a smooth, even finish. Choose an exterior-grade spray paint specifically formulated for metal and follow the same prep steps for the best results.