How to Set Up a Hammock Stand?
On this page (7 sections)
Setting up a hammock stand is surprisingly simple. You can typically assemble most stands in under 30 minutes with just a few tools. It’s all about lining up the support pieces and securing them properly. This makes it easy to enjoy your hammock anywhere, rain or shine!
A hammock stand offers a fantastic way to relax without needing trees. It’s a A hammock stand offers a fantastic way to relax without needing trees; learn how to hang a hammock without trees.portable solution for your backyard, patio, or even camping trips. Many stands are designed for quick assembly and disassembly, making them incredibly convenient for various setups. We found that choosing the right stand often depends on your space and how often you plan to move it.
- Hammock stands let you relax without trees.
- Assembly is usually quick and easy.
- Many stands are portable for different locations.
- Choose a stand based on your space and needs.
Ready to get your hammock ready for lounging? Let’s walk through exactly how to set up your hammock stand, step by step.
Getting Your Hammock Stand Assembled and Ready
Setting up your hammock stand is easier than you might think! You’ll likely be relaxing in no time. Most stands require minimal tools and go together quickly. We’ll guide you through each step so you can enjoy that gentle sway.
Pre-Assembly Checklist: What You’ll Need
Before you dive in, let’s make sure you have everything ready. It’s like preparing for a great picnic – organization makes it much more enjoyable. Check your box for all the parts. Lay them out on a clean, flat surface.
Unpacking and Identifying Components
Open the box carefully. You’ll usually find a set of metal or wooden poles. These form the main structure of your stand. There will also be hardware, like bolts, nuts, and washers. Some stands might come with a small wrench or Allen key.
Refer to the instruction manual that came with your stand. It will have diagrams showing each piece. This is your best friend for assembly. Make sure you have all the listed parts. It’s frustrating to get halfway through and realize something is missing.
Essential Tools (If Not Included)
Most modern hammock stands are designed for tool-free assembly. They often use quick-release pins or hand-tightened knobs. However, some might require basic tools. Check your manual!
You might need a Phillips head screwdriver or a wrench. If your stand uses nuts and bolts, a socket wrench set is handy. Measure the bolt heads to see what size you’ll need. Having these tools ready means you won’t have to stop mid-build.
Choosing the Right Location
Where will you set up your hammock oasis? Think about where you want to relax the most. Do you want morning sun or afternoon shade?
Find a level spot for your stand. An uneven surface can make the stand wobbly. This isn’t safe and can put extra stress on the structure. Avoid placing it directly under trees that might drop branches or sap. Also, consider proximity to an outlet if you plan to use any lighting or a fan.
Step-by-Step Assembly Guide
Now for the fun part! Let’s start putting it together. We’ll break it down into simple stages.
Assembling the Base Support Structure
Many hammock stands have an ‘X’ shaped base. Or, they might have two separate curved legs. You’ll usually connect these pieces first.
Look for the longest poles or the pieces designed to form the legs. They might have holes for bolts or slots for pins. Connect these base pieces according to your manual. Ensure they fit snugly. Don’t tighten everything completely just yet. Leave a little wiggle room.
Connecting the Leg Sections
If your stand has separate legs, you’ll typically join them with a central crossbar. This crossbar adds stability. Insert the bolts through the holes in the legs and the crossbar. Add washers and nuts. Tighten them finger-tight for now.
Securing the Base with Pins or Bolts
Some stands use quick-release pins. You simply push the pin through the aligned holes. You’ll hear or feel a click when it’s locked. Others require bolts. If using bolts, make sure you’re using the correct size as indicated in the manual. Hand-tighten these first.
Attaching the Upright Support Arms
Once the base is stable, you’ll attach the upright pieces. These are the vertical supports that hold the hammock. They usually connect to the top of the leg sections.
Find the poles that extend upwards. They might have curved ends or specific connection points. Align these with the top of your base structure. Again, check your manual for the exact placement. They should be mirror images of each other.
Using the Correct Hardware for Uprights
You’ll likely use bolts, washers, and nuts here too. Or, perhaps a larger securing pin. Make sure the bolt goes through all designated holes. Add a washer before the nut. This helps distribute pressure and protects the metal. Finger-tighten these connections as well.
Installing the Top Bar or Hammock Hooks
The very top of the stand needs a way to hold your hammock. This could be a simple horizontal bar or dedicated hooks. This piece connects the two upright supports.
Identify the top bar or the hook attachments. These usually slide into place or bolt onto the very top of the uprights. Ensure they are oriented correctly – you want the hooks facing outwards or the bar level.
Ensuring a Secure Fit for the Top Piece
This top piece is critical for stability. Make sure it’s seated properly. If it bolts on, use the specified hardware. Tighten these bolts firmly but avoid overtightening, which could strip the threads. If it’s a slot-in piece, ensure it’s fully inserted and secured by any locking pins.
Final Tightening and Inspection
You’re almost there! This is where you make sure everything is solid and safe.
Systematically Tighten All Hardware
Go back to each bolt and nut you installed. Now, tighten them securely. Work in a criss-cross pattern if possible, similar to how you’d tighten lug nuts on a car tire. This helps ensure even pressure.
Don’t over-tighten! You want the connections to be snug and secure, not stripped. A good rule of thumb is to tighten until you feel firm resistance. Then, give it about a quarter turn more.
Checking for Stability and Levelness
Give the stand a gentle push and pull. Does it wobble? Are there any loose parts? If it feels unstable, double-check all your connections. Make sure all pins are fully engaged and bolts are tight.
Is the stand sitting level on the ground? If not, you might need to adjust its position slightly. Sometimes, a small shim under one of the feet can help. A stable, level stand is key for your comfort and safety.
Attaching Your Hammock
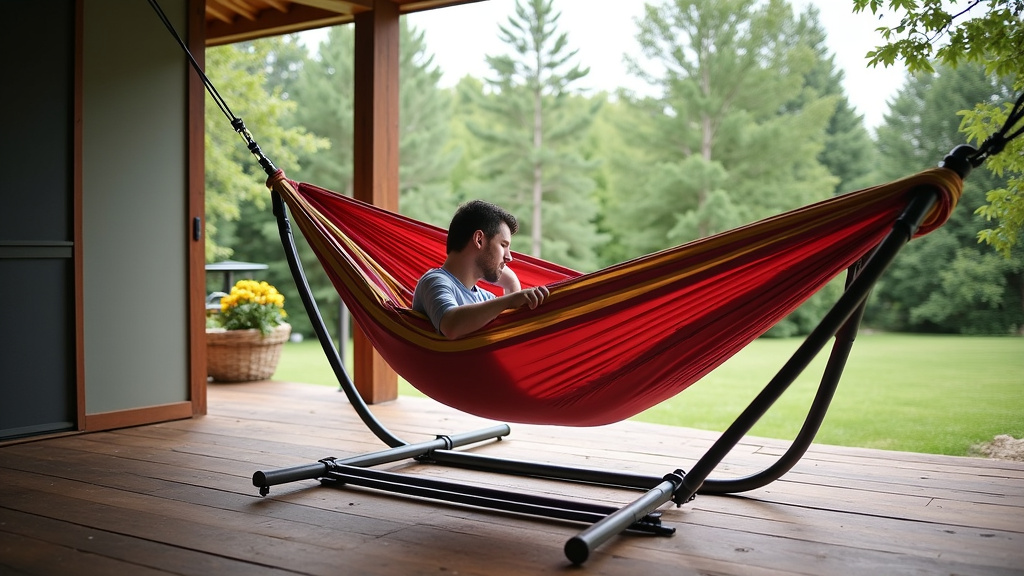
Now, the moment you’ve been waiting for! Hang your hammock. If your stand has S-hooks, simply loop your hammock’s carabiners or grommets onto them. If it has a top bar, you might use a rope or a specialized hammock spreader bar.
Ensure the hammock is centered. You don’t want all the weight on one side. Check that the hammock isn’t touching the ground when you sit in it. You should have a nice, gentle sag. Many guidelines suggest that the lowest point of the hammock should be about 18 inches off the ground when occupied (CDC).
Quick Hammock Stand Setup Checklist
- Unpack all parts and verify against the manual.
- Gather any necessary tools (screwdriver, wrench).
- Select a flat, stable location for the stand.
- Assemble base support pieces, finger-tightening first.
- Attach upright arms and top support, finger-tight.
- Systematically tighten all hardware securely.
Conclusion
You’ve successfully navigated the steps to set up your hammock stand! By carefully unpacking, identifying your parts, and following the assembly guide, you’ve created your own relaxation station. Remember, a stable, level stand is key to enjoying those peaceful moments. Now that your stand is ready, it’s time to hang your hammock and experience the simple joy of lounging. Go ahead and give that hammock a try!
Frequently Asked Questions
How long does it typically take to set up a hammock stand?
Most hammock stands can be assembled in under 30 minutes. We found that stands designed for tool-free assembly are often the quickest to put together. Just follow your manual, and you’ll be relaxing soon!
Do I really need tools to set up a hammock stand?
Many modern hammock stands are designed for tool-free assembly, using quick-release pins or hand-tightened knobs. However, it’s always a good idea to check your specific stand’s manual, as some may require a basic screwdriver or wrench.
What’s the best type of surface to set up my hammock stand on?
You’ll want to set up your hammock stand on a level and stable surface. An uneven spot can make the stand wobbly and less safe. Avoid areas with potential hazards like falling branches.
My hammock stand feels a little wobbly. What should I do?
A wobbly stand usually means something isn’t fully tightened or it’s not on a level surface. Go back and systematically tighten all nuts and bolts, ensuring they are snug. Check that the stand is sitting evenly on the ground; you might need a small shim under one leg.
Can I leave my hammock stand set up outdoors all the time?
While many hammock stands are made of weather-resistant materials, it’s often best to store them indoors or cover them during harsh weather or extended periods of disuse. This helps prolong their lifespan and keeps them looking their best.