
How Do You Paint Cast Aluminum Patio Furniture?
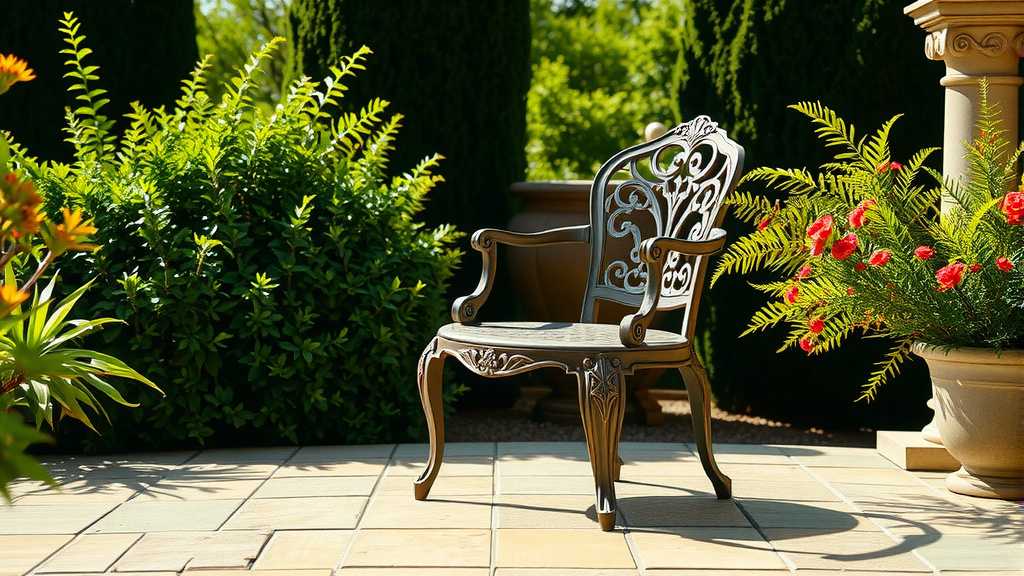
To paint cast aluminum patio furniture effectively, you first need to thoroughly clean, degrease, and lightly sand the surface to create a proper bond. Always apply a specialized etching or self-etching primer designed for aluminum before applying your chosen exterior-grade paint.
This careful preparation ensures that your new paint finish adheres strongly, resists peeling, and protects your furniture for many enjoyable seasons outdoors.
- Get ready to paint by first giving your furniture a deep clean.
- Rough up the surface slightly with light sanding – it helps paint stick!
- An etching primer is your secret weapon for long-lasting paint on aluminum.
- Use several thin coats of exterior paint instead of one thick layer.
- Give your freshly painted pieces plenty of time to dry and cure before use.
How Do You Paint Cast Aluminum Patio Furniture?
Painting cast aluminum furniture involves a few straightforward but crucial steps: cleaning, sanding, priming with an etching primer, and then applying outdoor-specific paint. Following this process ensures a beautiful, durable finish that extends the life of your patio pieces.
Why Paint Your Cast Aluminum Furniture?
Perhaps your beloved patio set looks a bit tired, or maybe you simply want a fresh new color. Painting offers a wonderful way to transform its appearance without buying new. It’s like giving your furniture a second chance at life.
Beyond aesthetics, painting also adds a protective layer against the elements. This shield helps your furniture resist corrosion and wear, keeping it functional and attractive for many more years to come.
Is Painting Cast Aluminum Really Possible?
Absolutely! Many homeowners wonder if aluminum can truly hold paint well. We found that with the correct preparation and choice of materials, painting cast aluminum is not only possible but also highly effective and durable (Consumer Reports data often supports this).
The key lies in understanding how aluminum differs from other metals. It needs specific primers to ensure the paint bonds properly, preventing frustrating peeling later on. Think of it as laying a strong foundation for a house.
Gathering Your Painting Supplies
Before you dive into painting, taking a moment to gather all your tools makes the process much smoother. Nobody wants to stop mid-project for a forgotten item, right? A little planning saves a lot of hassle.
Choosing the Right Paint for Cast Aluminum
For outdoor furniture, you’ll want paint that can withstand sun, rain, and temperature changes. We found that exterior acrylic latex or oil-based paints designed for metal work best. Many experts say that spray paints specifically formulated for outdoor metal are a great choice for ease and an even finish.
Brands like Rust-Oleum or Krylon offer excellent options that are often labeled as “paint + primer” for metal. While these can be good, we still recommend a separate etching primer for cast aluminum for the best adhesion.
Don’t Forget the Primer!
This is where aluminum gets special treatment. Unlike iron, aluminum doesn’t rust, but it can corrode and has a very smooth, non-porous surface. This smoothness makes it hard for paint to stick.
That’s why an etching primer is absolutely vital. It chemically etches the surface, creating tiny microscopic pores that the paint can really grip onto. Many experts emphasize that skipping this step is the most common reason for paint failure on aluminum.
Essential Safety Gear You’ll Need
Your safety always comes first! When working with chemicals and paints, a few items are non-negotiable. Always wear gloves to protect your hands from chemicals and paint.
Additionally, use a good quality respirator mask to avoid inhaling paint fumes, especially if you’re spray painting. Eye protection is also a must to shield against accidental splashes or airborne particles. It’s like wearing a helmet when you ride a bike – simple but smart.
Step-by-Step: Preparing Your Furniture for Paint
This stage is arguably the most important. A brilliant paint job can quickly fail if the surface isn’t prepared correctly. Think of it as cleaning a canvas before an artist paints a masterpiece.
Cleaning Your Cast Aluminum Furniture
Start by removing any loose dirt, grime, or old flaking paint. A simple scrub with warm water and mild dish soap usually works wonders. For stubborn grease or mildew, a degreaser or a dilute bleach solution (like 1 part bleach to 10 parts water) can be effective.
Make sure to rinse thoroughly afterwards to remove all soap or cleaning residue. Any leftover soap can prevent your primer and paint from sticking properly. Imagine trying to glue something to a greasy plate – it just won’t work.
Sanding for Success: Creating a ‘Tooth’
Once clean and dry, lightly sand the entire surface of the furniture. Use a fine-grit sandpaper, around 220 to 300 grit. The goal isn’t to remove all existing paint, but rather to scuff the surface gently.
This light sanding creates a “tooth” or texture that gives the primer something to grab onto. It’s like slightly roughing up a smooth wall before applying wallpaper; it just helps everything adhere better.
Dealing with Corrosion or Imperfections
While aluminum doesn’t rust like steel, it can develop white, powdery corrosion or pitting over time. For minor corrosion, a wire brush or coarse sandpaper can help remove it. For deeper pits, you might need a metal filler, which should be sanded smooth once dry. We found that addressing these issues now prevents them from showing through your new paint later.
Rinse and Dry Thoroughly
After sanding and addressing any imperfections, give your furniture one final rinse. This wash removes all sanding dust and any remaining grit. A power washer can be useful here, but a hose works just as well.
Allow the furniture to dry completely, preferably in the sun or with a fan. We recommend letting it sit for at least 24 hours to ensure there’s absolutely no trapped moisture, especially in intricate cast patterns. Moisture beneath paint is a recipe for disaster.
The Painting Process: From Primer to Perfection
With your furniture prepped and ready, it’s time for the fun part! This stage requires patience and a steady hand. Remember, thin coats are always better than thick ones.
Applying Your Etching Primer
Shake your etching primer can vigorously for at least a minute. Apply it in thin, even coats, holding the can about 8-12 inches from the surface. Avoid spraying too heavily in one spot to prevent drips.
Many experts suggest two thin coats of primer, allowing the first to dry to the touch before applying the second. This creates a really strong, uniform base for your topcoat. Always check the manufacturer’s drying recommendations.
Painting Techniques for a Smooth Finish
Once the primer is fully dry, it’s time for your chosen color. Whether you’re using spray paint or a brush, the principle remains the same: multiple thin coats are key. This approach prevents drips and provides a much more durable, professional-looking finish than one thick coat.
For spray paint, keep the can moving in consistent, overlapping strokes. If brushing, apply paint smoothly, following the contours of the furniture. Allow each coat to dry completely before applying the next. This might take several hours, or even overnight, depending on the paint type and weather.
Mind the Weather: Temperature and Humidity
Painting on a perfect day makes a huge difference. We found that painting in temperatures between 50°F and 85°F (10°C and 30°C) with low to moderate humidity often yields the best results. Extremely hot or cold weather, or high humidity, can affect paint drying times and adhesion.
Avoid painting in direct, scorching sunlight as it can dry the paint too quickly, leading to unevenness or bubbling. A warm, dry, overcast day is often ideal – like a gentle spring afternoon.
| Feature | Spray Paint | Brush Painting |
|---|---|---|
| Ease of Use | Very easy for even coverage | Requires more skill for smoothness |
| Finish | Smoother, more factory-like | Can show brush strokes |
| Speed | Much faster for large items | Slower, more meticulous |
| Cost | Can be more expensive per volume | Often cheaper per volume |
| Detail | Great for intricate patterns | Good for small touch-ups |
After Painting: Curing and Care
You’ve done the hard work, but the process isn’t quite over. The paint needs time to fully harden, a stage called curing. Skipping this can lead to marks, chips, and a less durable finish.
Curing Time: Patience is a Virtue
While paint might feel dry to the touch in a few hours, it takes much longer to fully cure and reach its maximum hardness. This can range from a few days to several weeks, depending on the paint type and environmental conditions. Many paint manufacturers recommend waiting at least 7 days before light use, and longer for full strength.
During this curing period, treat your furniture gently. Avoid heavy use or stacking items that might scratch the new finish. It’s like waiting for cement to set; rushing it weakens the whole structure.
How to Maintain Your Newly Painted Furniture
To keep your freshly painted cast aluminum looking great, simple maintenance goes a long way. Regularly wipe it down with a soft cloth and mild soap and water to remove dirt and dust. Avoid harsh chemical cleaners, which can dull or damage the paint.
Should you notice any small chips or scratches over time, a quick touch-up with your leftover paint can prevent larger issues. Catching minor damage early helps protect the aluminum underneath and keeps your furniture looking pristine.
- Get started by thoroughly cleaning your furniture.
- Lightly sand the surface to help paint grip.
- Apply a specialized etching primer for aluminum.
- Use at least two thin coats of your chosen outdoor paint.
- Allow ample drying time between coats and for full cure.
- Always check weather conditions before painting.
Conclusion
Repainting your cast aluminum patio furniture is a rewarding project that can breathe new life into your outdoor space. By following these steps – from meticulous cleaning and sanding to proper priming and careful paint application – you can achieve a durable and beautiful finish that truly lasts. Remember, patience and attention to detail are your best tools in this process. Your rejuvenated furniture will be ready to host countless gatherings and quiet moments for years to come.
How long does painted cast aluminum furniture last?
With proper preparation and high-quality exterior paint, painted cast aluminum furniture can last anywhere from 5 to 10 years, or even longer. Regular cleaning and prompt touch-ups for any chips can significantly extend its lifespan, protecting it from the elements and wear.
Can I paint over old paint without stripping it?
You can often paint over old, well-adhered paint if it’s not peeling or flaking. Just ensure the old surface is thoroughly cleaned and lightly sanded to create a good “tooth” for the new primer and paint. If the old paint is in poor condition, stripping it is recommended for the best, longest-lasting results.
What’s the best time of year to paint patio furniture?
The best time to paint patio furniture is typically during spring or early fall. These seasons often offer stable temperatures between 60°F and 80°F (15°C and 27°C) with moderate humidity. Avoid extreme heat, cold, or high humidity, as these can negatively impact paint drying and adhesion.
Is it worth painting old cast aluminum furniture, or should I replace it?
Painting old cast aluminum furniture is often a very worthwhile project, especially if the furniture is structurally sound. Cast aluminum is durable, and a fresh coat of paint can dramatically improve its appearance and extend its life for a fraction of the cost of buying new. It’s an eco-friendly choice too, as it reduces waste.
What if my painted furniture starts peeling?
If your painted furniture starts peeling, it usually indicates a lack of proper surface preparation before painting, particularly skipping the etching primer. To fix it, you’ll need to sand down the peeling areas, or even the entire piece, back to the bare aluminum. Then, re-clean, prime with an etching primer, and repaint using thin, even coats.
