
How to Store a Adirondack Chair for Winter?
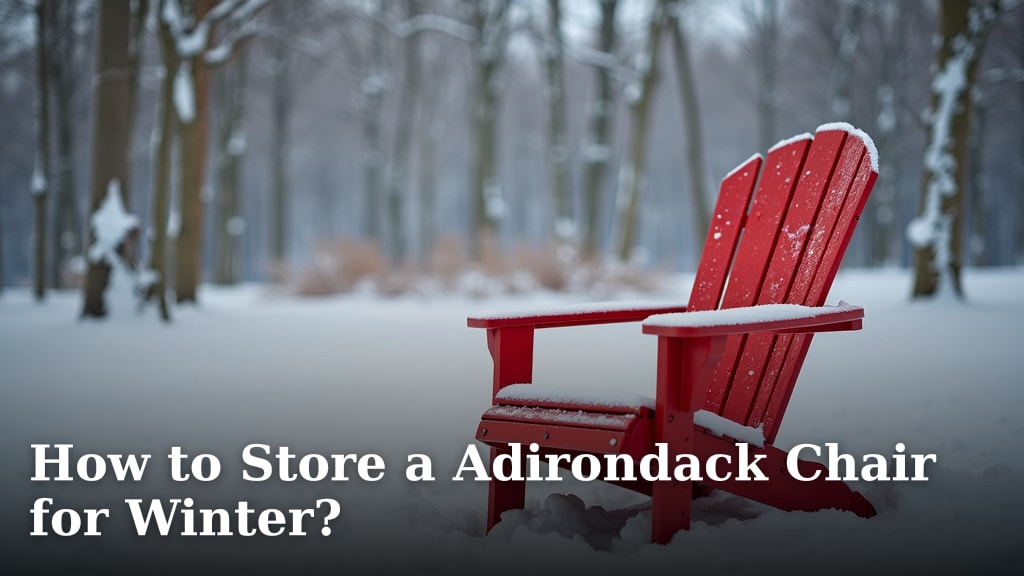
The best way to store an Adirondack chair for winter is to clean it thoroughly, let it dry completely, and then move it indoors to a shed, garage, or basement. If indoor storage isn’t possible, cover it with a durable, waterproof cover. These steps will protect your investment.
You’ve likely spent good money on those comfortable chairs, right? Leaving them outside year-round exposes them to harsh elements like snow, ice, and freezing temperatures. This can lead to cracking, warping, and fading, especially for wooden chairs. Proper winter storage helps maintain their beauty and longevity, saving you money on repairs or replacements.
- Clean Thoroughly: Remove dirt and grime.
- Dry Completely: Prevent mold and mildew.
- Store Indoors: Best protection from elements.
- Use a Cover: Essential for outdoor storage.
- Protect Your Investment: Ensure chairs last for years.
Let’s walk through exactly how to prepare and store your Adirondack chairs so they’re ready for many more seasons of relaxation.
Preparing Your Adirondack Chairs for Winter Storage
So, you’re ready to tuck those beloved Adirondack chairs away for their long winter’s nap, right? The key here is proper preparation. Think of it like putting your garden to bed for the season. A little effort now saves a lot of headaches later. We found that the main goal is to protect your chairs from moisture, dirt, and harsh temperatures. This proactive approach ensures they emerge next spring looking almost as good as new.
Thorough Cleaning is Your First Step
Before you even think about moving your chairs, they need a good scrub. You wouldn’t put away dirty dishes, would you? The same applies here. Dirt, grime, and environmental residue can really embed themselves over time. This makes proper cleaning a must-do.
Cleaning Wooden Adirondack Chairs
Wooden chairs, especially those made of cedar or teak, need a gentle but effective touch. Start by brushing off any loose debris. A soft-bristled brush works wonders for this. Then, mix a solution of mild soap and warm water. We often recommend a few drops of dish soap.
- Scrub gently: Use a sponge or a soft brush to clean all surfaces. Pay special attention to crevices where dirt hides.
- Rinse thoroughly: A garden hose on a low setting is perfect. Make sure no soapy residue remains.
- Address mildew: If you spot any mildew, a solution of one part bleach to three parts water can be used (CDC). Apply sparingly, let it sit for a few minutes, then rinse completely. Test on an inconspicuous area first.
- Consider sanding and sealing (optional): For unfinished wood, a light sanding and application of a wood sealant can offer extra protection. This isn’t strictly necessary every winter, but it can extend their life.
Cleaning Plastic and HDPE Adirondack Chairs
Plastic and HDPE (high-density polyethylene) chairs are much easier to clean. They’re built for durability. A simple wash with soap and water is usually all it takes. For tougher stains, you might use a Mr. Clean Magic Eraser or a non-abrasive household cleaner.
- Wipe down: Use a cloth or sponge with soapy water.
- Rinse well: Ensure all cleaning agents are removed.
- For tough stains: A soft scrub brush might be needed. Avoid anything abrasive that could scratch the surface.
The Importance of Complete Drying
After cleaning, drying is arguably the most critical step. Why? Moisture is the enemy. Trapped moisture leads to mold, mildew, and can even cause wood to rot or warp. No one wants to discover a fuzzy green surprise on their chairs next spring, right?
Let your chairs air dry completely. This might take a full day or two, depending on humidity and sunlight. Position them so water can drain easily. You can even use a clean towel to hand-dry any stubborn spots. Just be patient; it’s worth the wait.
Choosing the Right Winter Storage Location
Once your chairs are sparkling clean and bone dry, it’s time to find them a winter home. Your choice of location depends largely on what’s available to you. Each option offers different levels of protection.
Indoor Storage: The Gold Standard
If you have the space, storing your Adirondack chairs indoors is hands down the best option. This provides maximum protection from all the elements. Think of it as giving your chairs a cozy winter vacation inside.
Where to Store Them Indoors
Garages, sheds, basements, or even a spare room are ideal. These spaces offer a stable environment. They shield your chairs from freezing temperatures, snow, ice, and harsh winds. Your chairs will emerge looking pristine come springtime.
- Garages: Often the most convenient option.
- Sheds: Ensure it’s watertight and well-ventilated.
- Basements: Keep them away from any potential dampness.
- Spare rooms: If you have the space, why not?
Make sure the area is relatively dry. While indoor storage is great, excessive humidity in a basement could still be an issue. If you live in a very humid climate, consider running a dehumidifier in the storage area (NIH).
Maximizing Indoor Space
Adirondack chairs can be bulky. To save space, consider stacking them if their design allows. Some models are designed to nest. Others might require careful arrangement. You can also hang certain types of chairs on a wall if you have suitable hooks and strong studs. This gets them off the floor and out of the way.
Outdoor Storage: When Indoors Isn’t an Option
What if indoor space is a luxury you don’t have? Don’t worry! Outdoor storage is still viable, but it requires more preparation and the right gear. It’s all about creating a protective barrier against the winter nasties. Many of us don’t have expansive sheds, so this is a very common solution.
The Essential Role of a Durable Cover
A high-quality cover is non-negotiable for outdoor storage. This isn’t just any tarp. You need something specifically designed for outdoor furniture. We found that covers made from heavy-duty, waterproof, and UV-resistant material perform best. Look for features like reinforced seams and tie-downs to prevent the wind from whipping them away.
- Waterproof: Crucial to repel rain and snow.
- UV-resistant: Protects against sun damage even in winter.
- Breathable: Prevents condensation and mildew buildup underneath. Some covers have vents.
- Secure fit: Cords or buckles help keep the cover snug.
Measure your chairs before buying a cover. A cover that’s too small won’t protect adequately, and one that’s too large can flap in the wind, causing wear and tear on both the cover and the chair.
Choosing a Location for Covered Outdoor Storage
Even with a cover, where you place your chairs matters. Try to find a spot that offers some natural protection. Under an overhang, on a covered porch, or against a sheltered wall are good choices. This adds another layer of defense against direct exposure to heavy snow or driving rain. Elevating the chairs slightly off the ground can also help prevent moisture wicking up from below. You can use wood blocks for this.
| Storage Type | Pros | Cons | Best For |
|---|---|---|---|
| Indoor (Garage/Shed) | Maximum protection, extends lifespan, minimal upkeep | Requires available space, chairs must be moved | All chair types, especially wood |
| Indoor (Basement) | Excellent protection, stable temperature | Risk of humidity/dampness, chairs must be moved | All chair types, monitor for moisture |
| Outdoor (Covered) | Convenient, less moving effort, good protection with proper cover | Needs high-quality cover, still exposed to temperature swings | Durable plastic/HDPE, less delicate wood |
| Outdoor (Uncovered) | No effort (initially) | High risk of damage, drastically reduces lifespan, leads to warping/fading | Not recommended for any chair type you want to last |
Final Checks Before the Long Winter Nap
Before you say goodbye to your Adirondack chairs for the season, a few last-minute checks can make all the difference. These are like the final tuck-in before bed, ensuring everything is just right.
Inspect for Damage and Make Minor Repairs
Take a moment to look over each chair. Are there any loose screws? Any splintering wood? Small repairs now can prevent bigger problems later. Tighten any fasteners you find. For wooden chairs, a little wood glue can fix minor cracks. Addressing these issues now means your chairs will be in top shape when spring rolls around.
Leaving repairs until spring might mean you forget or, worse, the damage worsens over the winter. This is a small investment of time for a big return on durability.
Add Desiccants or Moisture Absorbers (Optional)
If you’re storing chairs in an area prone to dampness, like a basement or a shed that isn’t perfectly sealed, consider placing a desiccant nearby. These little packets or larger containers absorb excess moisture from the air. Think of those silica gel packets you find in new shoes or electronics. They can help prevent mold and mildew from forming. We’ve seen these used effectively in various storage scenarios (Environmental Protection Agency).
Your Winter Storage Checklist
To ensure you’ve covered all your bases, here’s a quick rundown of the essential steps. Following this checklist means your chairs are set up for success and ready for next year’s sunny days.
- Clean each chair thoroughly: Remove all dirt and grime.
- Allow chairs to dry completely: No moisture left behind!
- Decide on indoor or outdoor storage: Based on available space.
- If outdoor, select a quality, waterproof cover: Ensure it fits well.
- Inspect and perform minor repairs: Tighten screws, fix splinters.
- Position chairs carefully in storage: Stack or arrange to save space.
Conclusion
Protecting your Adirondack chairs this winter doesn’t have to be a chore. By taking the time to clean them thoroughly, ensure they are bone dry, and choose the right storage method, you’re investing in their future. Whether they find a cozy spot indoors or brave the elements under a protective cover, these steps will keep them looking great. You’ll thank yourself next spring when they’re ready for immediate use, offering comfort for many more seasons to come.
So, get those chairs ready for their winter rest. Your future self enjoying a warm day will appreciate your efforts!
Frequently Asked Questions
Can I just leave my Adirondack chairs outside uncovered all winter?
While you can, it’s not recommended if you want your chairs to last. Leaving them exposed to snow, ice, and freezing temperatures significantly shortens their lifespan. You’ll likely see damage like cracking, fading, and warping, especially with wooden chairs.
How do I prevent mold and mildew if I store my chairs in a damp basement?
First, make sure the chairs are completely dry before storage. If your basement is consistently damp, consider running a dehumidifier. You can also place moisture absorbers or desiccants near the chairs to help control humidity in the immediate area.
Is it really necessary to clean plastic Adirondack chairs before storing them?
Yes, even durable plastic or HDPE chairs benefit from a good cleaning. Dirt and grime left on the surface over winter can become harder to remove later. It also prevents any potential mold or mildew growth from developing on trapped organic matter.
My Adirondack chairs don’t stack. How can I save space during indoor storage?
If your chairs don’t nest or stack, consider arranging them vertically against a wall. For lighter models, you might be able to hang them on sturdy wall hooks if you have appropriate wall studs. Otherwise, tuck them into unused corners of your garage or shed.
What kind of cover is best for outdoor Adirondack chair storage?
Look for a cover made from heavy-duty, waterproof, and UV-resistant material. We found covers with reinforced seams and tie-downs work best to prevent wind damage. Ensure it’s breathable to prevent condensation underneath, and measure your chairs for a snug fit.
