
How To Restore Faded Cast Aluminum Patio Furniture?
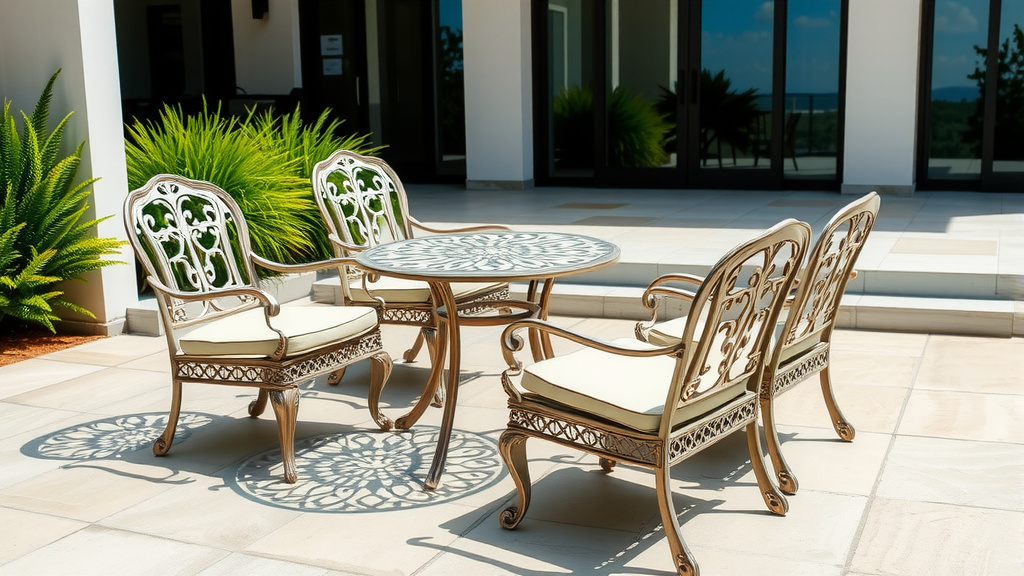
You can restore faded cast aluminum patio furniture by thoroughly cleaning the surface, preparing it with light sanding and primer, and then applying a fresh coat of outdoor-grade paint.
The key steps involve degreasing, scuffing the surface for paint adhesion, priming, and applying thin, even coats of durable paint designed for metal outdoor use.
Here’s a quick overview of how to breathe new life into your outdoor pieces:
- Clean Thoroughly: Remove all dirt, grime, and loose paint.
- Prep the Surface: Lightly sand and apply a good primer.
- Choose the Right Paint: Opt for rust-resistant, outdoor-grade spray paint.
- Apply Even Coats: Several thin coats are better than one thick one.
- Protect Your Work: Consider a clear coat for added durability.
How To Restore Faded Cast Aluminum Patio Furniture?
Restoring faded cast aluminum patio furniture involves a straightforward process of cleaning, preparing, and repainting. You can bring back its original beauty and extend its lifespan with a little effort.
Why Does Cast Aluminum Fade?
Cast aluminum is a great choice for patio furniture because it’s relatively lightweight and strong. However, even tough materials eventually succumb to the elements. Over time, constant exposure to UV rays from the sun, rain, and fluctuating temperatures will break down the paint’s finish.
This process causes the vibrant colors to dull and fade. You might notice chalkiness or a powdery residue, which signals that the protective clear coat or paint layer is deteriorating. Think of it like a suntan lotion wearing off after a long day at the beach!
Gather Your Restoration Arsenal: Tools & Supplies
Before you jump in, it’s smart to have everything ready. Imagine trying to bake a cake without all your ingredients; it just won’t work out. Here’s a basic list of what you will need for this patio furniture revival:
- Mild dish soap or degreaser
- Warm water
- Soft brushes or sponges
- Stiff wire brush (for stubborn spots)
- Fine-grit sandpaper (220-grit) or sanding sponges
- Painter’s tape
- Drop cloths or old newspapers
- Outdoor-grade metal primer
- High-quality outdoor spray paint (for metal)
- Optional: Clear topcoat sealant
- Safety glasses and gloves
Step 1: The Big Clean-Up
The first step, and arguably the most important, is a really good clean. Any dirt, grime, or mildew left on the surface will prevent new paint from sticking properly. We found that a thorough cleaning sets the stage for a lasting finish.
Start by brushing off any loose debris. Then, mix warm water with mild dish soap or a dedicated degreaser. Use a soft brush or sponge to scrub every surface. For tougher spots, a stiff wire brush can help, but be gentle to avoid scratching the aluminum.
Rinse your furniture completely with clean water. Make sure no soap residue remains. Allow the furniture to dry completely in the sun or use old towels. This might take a few hours, so be patient.
Step 2: Preparing the Canvas – Sanding and Smoothing
Now that your furniture is sparkling clean, it’s time for prep work. This step is about creating a smooth, adhesive surface for the new paint. Think of it as preparing a wall before painting – you want it perfectly ready.
Lightly sand all surfaces with 220-grit sandpaper or a sanding sponge. You don’t need to remove all the old paint, just scuff the surface to help the primer adhere. Pay extra attention to any chipped or flaking areas to create a smooth transition. Many experts say that proper sanding prevents future peeling (Paint Quality Institute).
After sanding, wipe down the furniture with a damp cloth to remove all dust and sanding residue. Let it dry completely again. This ensures you have a pristine surface for priming.
Step 3: Prime Time!
Priming is a non-negotiable step for cast aluminum. It creates a bond between the metal and the new paint, especially important for outdoor furniture. A good primer also helps hide minor imperfections and ensures a more uniform final color.
Choose an outdoor-grade metal primer, ideally one that specifically mentions adhesion to aluminum. Apply the primer in thin, even coats, following the product instructions. Two thin coats are often better than one thick one. Allow each coat to dry fully before applying the next. This step is like laying a strong foundation for a house.
Step 4: The Color Transformation – Painting
This is where the magic happens! Select a high-quality outdoor spray paint designed for metal. There’s a huge array of colors and finishes available, so pick something you love. Matte, satin, or gloss – the choice is yours!
Here’s a quick guide to painting success:
| Action | Details |
|---|---|
| Spray Technique | Hold the can about 8-12 inches from the surface. Use steady, sweeping motions. |
| Coats | Apply several light, even coats instead of one heavy one. This prevents drips and runs. |
| Drying Time | Allow recommended drying time between coats. Rushing can ruin the finish. |
| Ventilation | Always paint in a well-ventilated area, preferably outdoors on a calm day. |
| Tricky Areas | For intricate designs, angle the spray to reach all nooks and crannies. |
We found that rotating the furniture helps get into all the hidden spots. Don’t forget the undersides of legs and arms! A uniform application will give your furniture a professional, factory-fresh look.
Choosing the Right Paint
Not all paints are created equal, especially for outdoor use. Look for labels that mention “outdoor use,” “rust-inhibiting,” or “for metal.” Many brands offer products specifically formulated for patio furniture, providing UV protection and weather resistance.
Consider a paint-and-primer in one product if you’re looking to save a step, though a separate primer often offers superior adhesion for long-term durability. Some people prefer brush-on paint, but for cast aluminum’s often intricate designs, spray paint usually gives a smoother, more even finish. It’s about finding what works best for your project.
Step 5: Sealing the Deal (Optional but Recommended)
After your final coat of paint has dried completely (check the product label for specific cure times, which can be 24-48 hours), you might consider a clear protective topcoat. This step adds an extra layer of defense against UV rays, scratches, and general wear and tear.
Apply the clear coat just like the paint – in thin, even layers. This acts like a shield, giving your newly restored furniture an even longer life. It’s like putting a clear protector on your phone screen; it adds an extra layer of security.
Maintenance Tips for Lasting Beauty
Your restored cast aluminum furniture will look amazing, but it still needs a little love to stay that way. Regular, gentle cleaning prevents dirt buildup that can degrade the finish over time. Use mild soap and water for routine cleanings. Avoid harsh chemicals or abrasive scrubbers, as these can strip the new paint.
During extreme weather, like heavy rain or snow, covering your furniture can offer significant protection. This simple act can greatly extend the life of your fresh paint job. Think of it as giving your furniture a cozy blanket when the weather gets rough. Periodically inspect your furniture for any chips or scratches, and touch them up promptly to prevent further damage. Early intervention saves bigger repairs later.
Quick Restoration Checklist:
- Gather all tools and safety gear.
- Thoroughly clean and dry all furniture surfaces.
- Lightly sand to scuff the old finish.
- Wipe away all sanding dust.
- Apply 1-2 thin coats of metal primer.
- Apply 2-3 thin, even coats of outdoor spray paint.
- (Optional) Apply a clear protective topcoat.
- Allow furniture to cure completely before use.
Conclusion
Restoring faded cast aluminum patio furniture is a rewarding project that can dramatically refresh your outdoor living space. By following these steps – thorough cleaning, proper preparation, careful painting, and optional sealing – you’ll give your furniture a vibrant new lease on life. It’s a practical way to save money and enjoy your patio for many more seasons. You’ve put in the effort, and now you get to relax and enjoy the fruits of your labor!
Can I use any spray paint on cast aluminum?
No, it’s best to use spray paint specifically formulated for outdoor metal, like those labeled “outdoor-grade,” “rust-inhibiting,” or “for metal.” These paints offer better adhesion, UV resistance, and durability compared to general-purpose paints.
How long does the restoration process typically take?
The entire process, including cleaning, sanding, priming, painting multiple coats, and drying/curing times, can take anywhere from 2 to 4 days. Much of this time is waiting for coats to dry, so actual working time might be just a few hours spread out.
Do I need to strip all the old paint off?
Generally, no. You only need to remove loose, flaking paint and then lightly scuff the remaining old paint with fine-grit sandpaper. This creates a good surface for the new primer and paint to adhere to, saving you a lot of effort.
What if my furniture has rust spots?
Cast aluminum doesn’t rust in the same way iron does, but the paint finish might show rust-like discoloration if the metal beneath is reacting with impurities or if steel components (like screws) are present. Treat these spots with a wire brush, clean thoroughly, and ensure good primer coverage.
How often should I repaint my cast aluminum patio furniture?
With proper preparation and high-quality materials, your paint job can last many years – often 5-10 years or more. Regular cleaning and covering the furniture during harsh weather will help maintain the finish, extending the time between repaints.
