How To Paint Wicker Patio Furniture?
To paint wicker patio furniture, start by thoroughly cleaning the surface to remove dirt and mildew. Then, repair any damage, lightly sand for adhesion, apply an exterior-grade primer, and finish with several thin coats of durable exterior paint designed for outdoor use.
Ensure you choose a high-quality paint suitable for outdoor furniture to protect your wicker and ensure its painted finish lasts through varying weather conditions.
- Get your wicker ready by cleaning and making any small fixes.
- Choose the right paint: exterior-grade spray or brush-on.
- Always prime first for a smooth, lasting finish.
- Apply multiple thin coats for the best look and durability.
- Let each coat dry completely before adding the next.
How To Paint Wicker Patio Furniture?
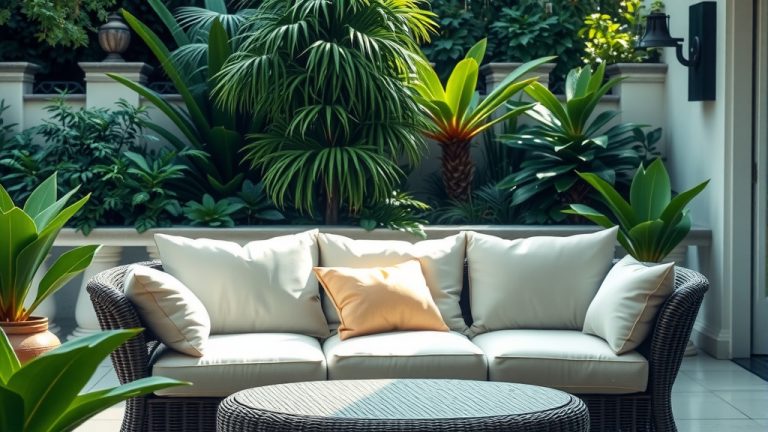
Painting wicker patio furniture involves thoughtful preparation, selecting the right materials, and careful application. It’s a project that brings new life to your outdoor space, transforming tired pieces into vibrant focal points.
Think of it as giving your furniture a fresh, protective shield against the elements, extending its useful life and enhancing your patio’s appeal.
Why Consider Painting Your Wicker?
Perhaps your beloved wicker set is looking a little faded, or maybe you’re simply ready for a change. Painting offers an affordable way to update your outdoor decor.
We found that a fresh coat of paint not only revives the appearance but also adds a layer of protection. This layer guards against sun, rain, and daily wear, a benefit many patio furniture specialists discuss.
Is Your Wicker Ready for a New Coat?
Before dipping into paint, take a moment to assess your furniture. Is it structurally sound? Are there any broken strands or weak spots?
Research often highlights the importance of starting with a good foundation. Fixing issues now prevents them from becoming bigger problems later on, ensuring your paint job looks excellent and lasts.
What Kind of Wicker Do You Have?
Wicker can be natural (like rattan or willow) or synthetic (resin or plastic). Knowing the type helps pick the correct materials.
Many experts say natural wicker needs more prep and a different type of paint than synthetic varieties. Synthetic wicker is generally easier to paint and maintain.
Gathering Your Painting Arsenal
Think of this stage like preparing for a cooking project. You wouldn’t start baking without all the ingredients, would you?
Having everything organized beforehand makes the painting process smoother and more enjoyable, preventing frustrating stops and starts.
Essential Supplies You’ll Need
To ensure a successful paint job, gathering the correct tools is step one. Having everything ready saves time and ensures a smooth process.
Here’s a helpful checklist of what you’ll want to have on hand:
- Drop cloths or plastic sheeting
- Mild soap and water (or a specialized cleaner)
- Stiff brush or soft scrub brush
- Small bucket
- Sandpaper (180-220 grit)
- Exterior-grade primer
- Exterior-grade paint (spray or brush-on)
- Paintbrushes (if not using spray paint)
- Protective gear (gloves, mask)
- Tack cloth or lint-free rags
Step-by-Step Guide to Painting Wicker Furniture
Ready to transform your wicker? Let’s walk through each stage carefully. Each step is important for a long-lasting and beautiful finish.
It’s like building a house; each layer supports the next, leading to a strong, good-looking outcome.
Step 1: Cleaning is Key
Imagine painting over a dusty table – the paint wouldn’t stick well, right? Wicker is similar. Dirt, dust, and mildew must go.
Many guidelines point to a thorough cleaning as a good first step (Mayo Clinic). Use mild soap and water with a stiff brush to gently scrub every crevice. Rinse well and let it dry completely.
Deep Cleaning Tips
For stubborn grime, a small amount of bleach in water (1 part bleach to 10 parts water) can help, particularly for mildew. Always test on an inconspicuous area first.
We found that letting the wicker air dry for at least 24-48 hours ensures no hidden moisture remains. Painting over damp wicker can cause future peeling.
Step 2: Repairing Any Damage
Look for any loose strands or small breaks. These minor flaws can be fixed using wood glue or a strong adhesive designed for outdoor use.
Tuck any loose ends back into place and secure them with glue. This step makes your furniture look tidier and prevents further fraying.
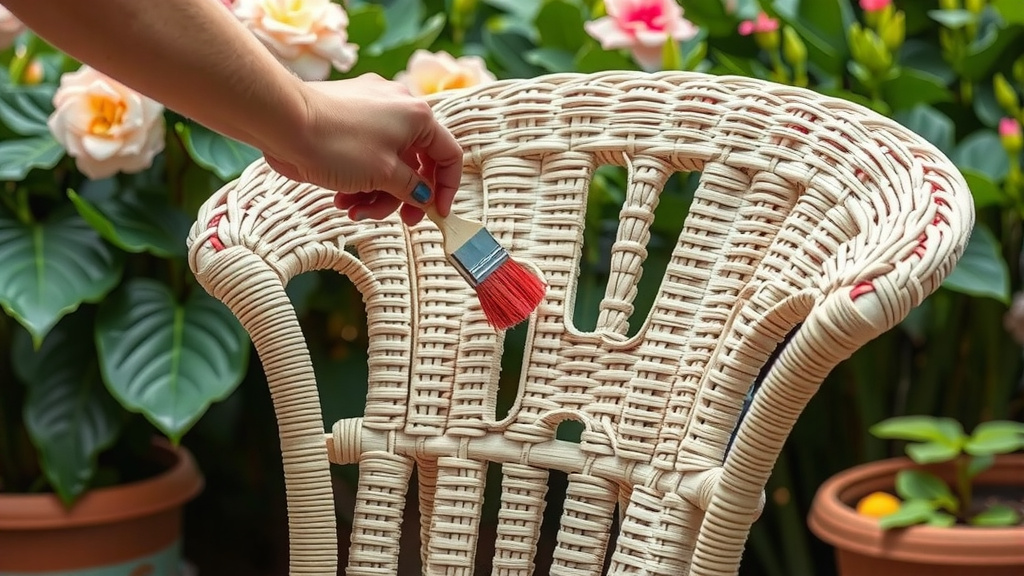
Step 3: Sanding for Success
Light sanding might seem odd for wicker, but it’s a game-changer. Use 180-220 grit sandpaper to gently scuff the surface.
This creates tiny scratches that give the primer something to “grab” onto, promoting better adhesion. Afterwards, wipe down with a tack cloth to remove all dust.
Step 4: Priming for Lasting Color
Primer is your secret weapon. It creates a uniform base, helps the paint stick, and often blocks stains from bleeding through.
Many painting professionals recommend an exterior-grade spray primer for wicker. It reaches into all the nooks and crannies effortlessly. Apply one to two thin, even coats.
Step 5: The Art of Painting Wicker
Now for the fun part! You have a choice: spray paint or brush-on paint. Both have their advantages.
Apply several thin coats rather than one thick one. Thin coats dry faster, look smoother, and are less likely to drip or crack.
Spray Painting vs. Brush Painting
Here’s a quick comparison to help you choose:
| Feature | Spray Painting | Brush Painting |
|---|---|---|
| Application Speed | Very Fast | Slower, More Detailed |
| Even Coverage | Excellent for intricate patterns | Requires more effort for evenness |
| Ease of Use | Easier for large pieces | Better for small details |
| Finish Smoothness | Generally smoother | Can show brush strokes |
If using spray paint, maintain a consistent distance (around 8-12 inches) and use sweeping motions. For brushing, use a high-quality exterior brush, working paint into all the woven areas.
Step 6: The Curing and Drying Process
Patience is truly a virtue here. While paint may feel dry to the touch in hours, it takes much longer to fully cure.
Many paint manufacturers advise waiting at least 24-48 hours between coats, and even longer before putting the furniture back into heavy use. This prevents nicks and sticky surfaces.
Maintenance Tips for Your Newly Painted Wicker
You’ve put in the effort, and your wicker looks fantastic. Now, how do you keep it that way?
Just like taking care of a garden, a little ongoing attention ensures your painted wicker remains a point of pride.
Protecting Your Investment
Regular, gentle cleaning with mild soap and water helps maintain the finish. Avoid harsh chemicals or abrasive scrubbers, which can damage the paint.
During extreme weather, consider covering your furniture or storing it indoors. This simple step can add years to its vibrant look, protecting it from intense sun or heavy rains.
Conclusion
Painting your wicker patio furniture is a rewarding project that combines creativity with practicality. By following these steps, you not only refresh its appearance but also extend its lifespan, making it a sustainable choice for your home.
Remember, the goal is a beautiful, durable finish that makes you smile every time you step onto your patio. With a little care and the right approach, your wicker can look stunning for seasons to come.
How long does it take to paint wicker patio furniture?
The total time varies depending on the size of the furniture and drying conditions. Expect to spend a full weekend or several evenings on the project, allowing for proper cleaning, priming, and multiple paint coats with ample drying time in between.
Can I paint wicker that has mold or mildew?
Yes, but you must thoroughly clean and treat the mold or mildew first. Use a mixture of bleach and water, scrub it completely, and ensure the wicker is fully dry before applying any primer or paint. Painting over mildew will only trap it underneath the new finish.
Is spray paint better than brush-on paint for wicker?
For wicker’s intricate woven texture, spray paint often provides a more even and smooth finish, reaching into all the small crevices easily. Brush-on paint can be used, but it requires more patience and smaller brushes to cover every area without drips.
Do I really need to use a primer on wicker?
Yes, priming is a crucial step. An exterior-grade primer ensures the paint adheres properly, provides a uniform base for the color, and helps seal the wicker, preventing the final paint from peeling or chipping prematurely. It makes a significant difference in durability.
What kind of paint is best for outdoor wicker?
Always choose an exterior-grade paint specifically designed for outdoor furniture. Look for labels that mention durability, weather resistance, and suitability for wood or plastics (depending on your wicker type). Acrylic latex or oil-based paints are common choices for this application.